

1. Open Happycapy
Visit happycapy.ai, sign in, and open your first Project.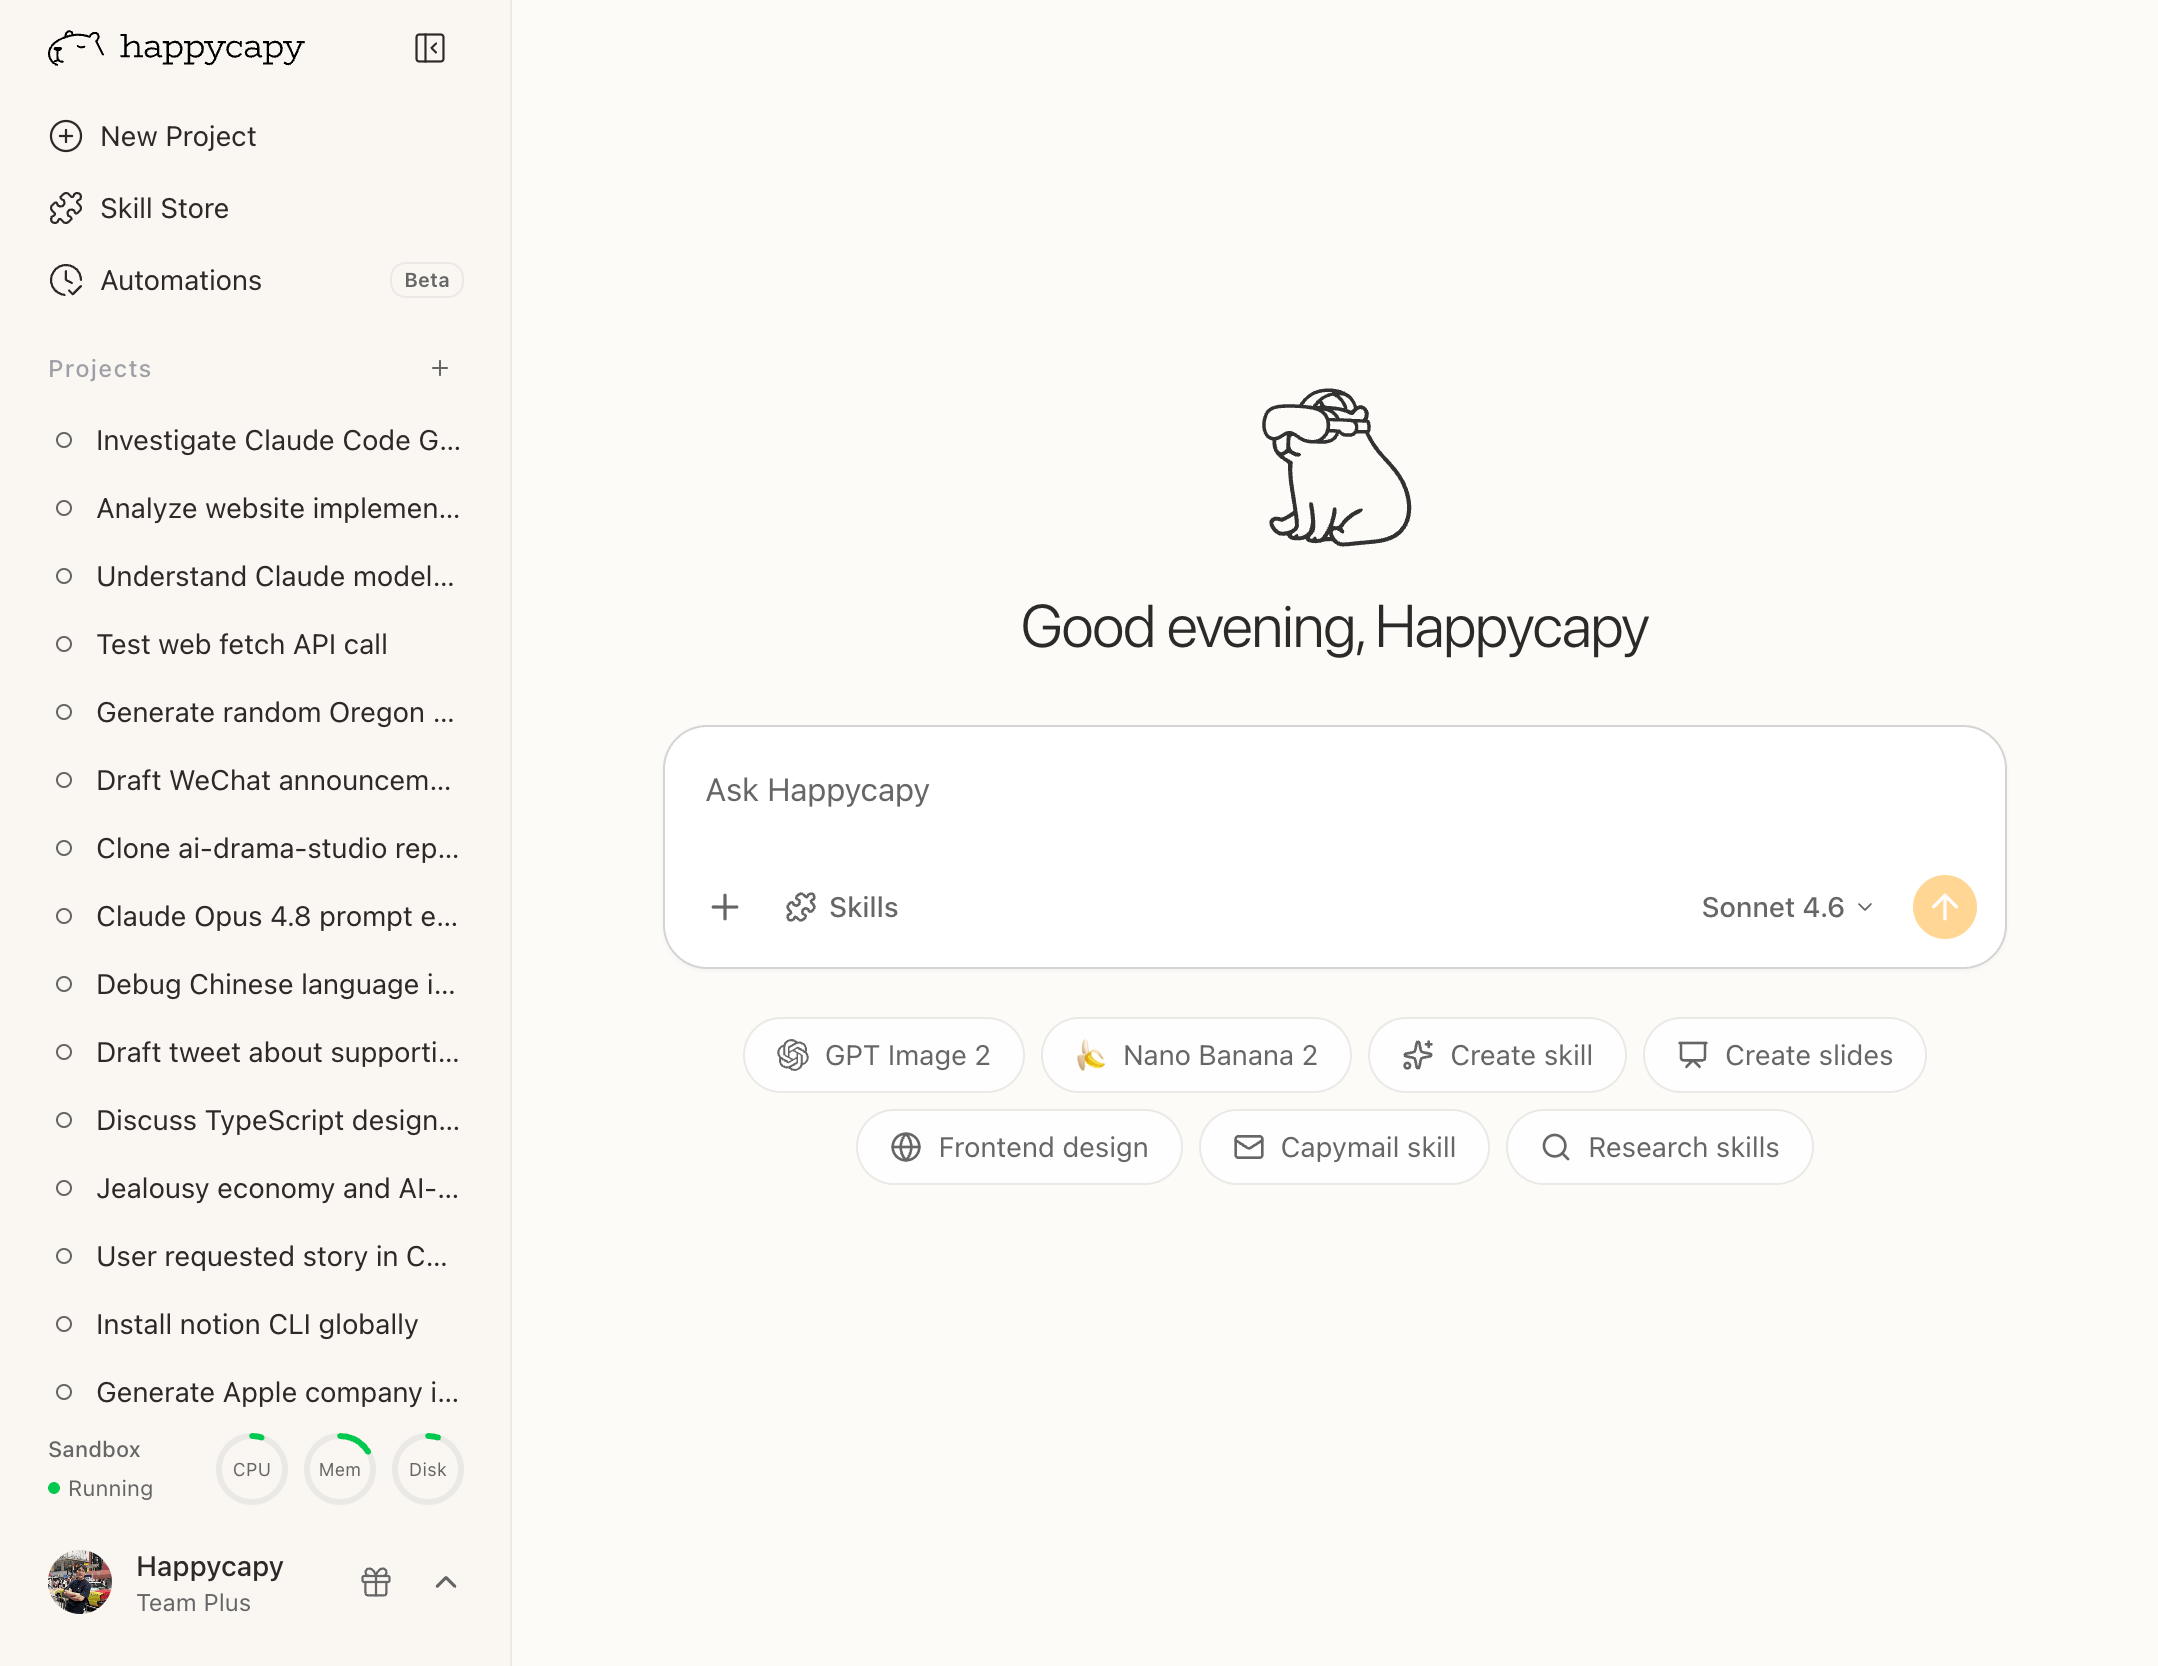
- Sidebar — Create Projects, browse the Skill Store, and set up Automations.
- Projects — Work with Happycapy in a persistent workspace and follow progress as it runs.
- Input box — Type a request, attach files with +, choose a Skill, or pick a model when needed.
2. Ask for a result
Tell Happycapy what you want done. A good request usually includes the goal, context, and desired output.3. Add files when the task needs context
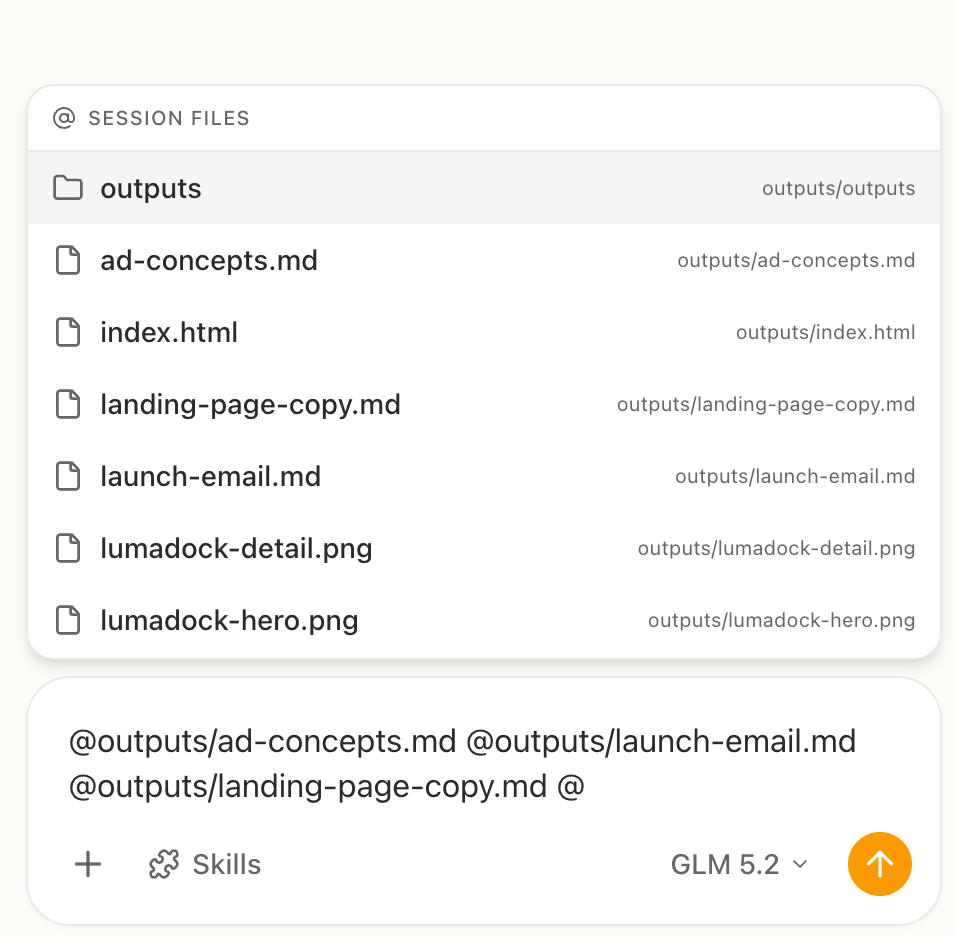
Drag files into the conversation, or click + in the input box. Happycapy can work with common files such as spreadsheets, PDFs, images, code, videos, CSV, and JSON. Use files when you want Happycapy to analyze source material, transform an existing asset, or continue work from something you already have. If a file or folder is already in the Project, type@ in the input box and choose it from Session Files. This works for uploaded files, folders, and files Happycapy generated under outputs/, so you can ask Happycapy to inspect, edit, summarize, convert, or continue from a specific artifact without uploading it again.
4. Use Skills for repeated work
You do not need to install a Skill for every task. Describe what you want first, and Happycapy can choose relevant Skills when they fit the work. Use the Skill Store when you want a repeatable workflow or a specific capability. You can also browse public Skills on the website. You can also type/ in the input box to use slash commands. Slash commands can launch Skills directly, which is faster when you already know the workflow you want.
5. Keep going
Projects
Use Projects as persistent workspaces for sessions, files, and ongoing work.
Files
Find generated outputs, uploaded files, and materials you want to reuse.
Skill Store
Add reusable Skills for repeated workflows and specific capabilities.
Automations
Schedule recurring tasks and long-running work from a Project.