> ## Documentation Index
> Fetch the complete documentation index at: https://docs.happycapy.ai/llms.txt
> Use this file to discover all available pages before exploring further.

# 图片生成与编辑

> 在 Project 里生成、修改、混合图片并准备参考图

## 什么是图片生成与编辑？

图片生成与编辑可以让你在一个 Project 里生成新图、修改已有图片，并把多张视觉参考组合成一个结果。它适合用来做封面图、产品图、活动视觉、视频参考帧，以及其他需要和项目文件保存在一起的静态图片。

先说你想要的结果，不要先从模型名开始。Happycapy 可以帮你选择合适路径，把输出保存到 Files，并把提示词、参考图和生成结果放在同一个 Project 里，方便之后继续迭代。

## 三种开始方式

根据你手头已经有的输入开始：文字、一张图片，或多张参考图。

### 1. 从文字开始

直接描述你想要的图片。Happycapy 可以生成图片，并把它和其他 Project 文件保存在一起。

<div style={{ display: 'grid', gridTemplateColumns: 'repeat(auto-fit, minmax(250px, 1fr))', gap: '1rem', margin: '1rem 0 2rem' }}>
  <div style={{ gridColumn: '1 / -1', border: '1px solid rgba(46, 41, 41, 0.1)', borderRadius: '12px', overflow: 'hidden', background: '#fffdf9' }}>
    <div style={{ padding: '1.1rem' }}>
      <div style={{ fontSize: '0.78rem', textTransform: 'uppercase', letterSpacing: '0.08em', color: '#df7657', fontWeight: 750 }}>Text to image</div>
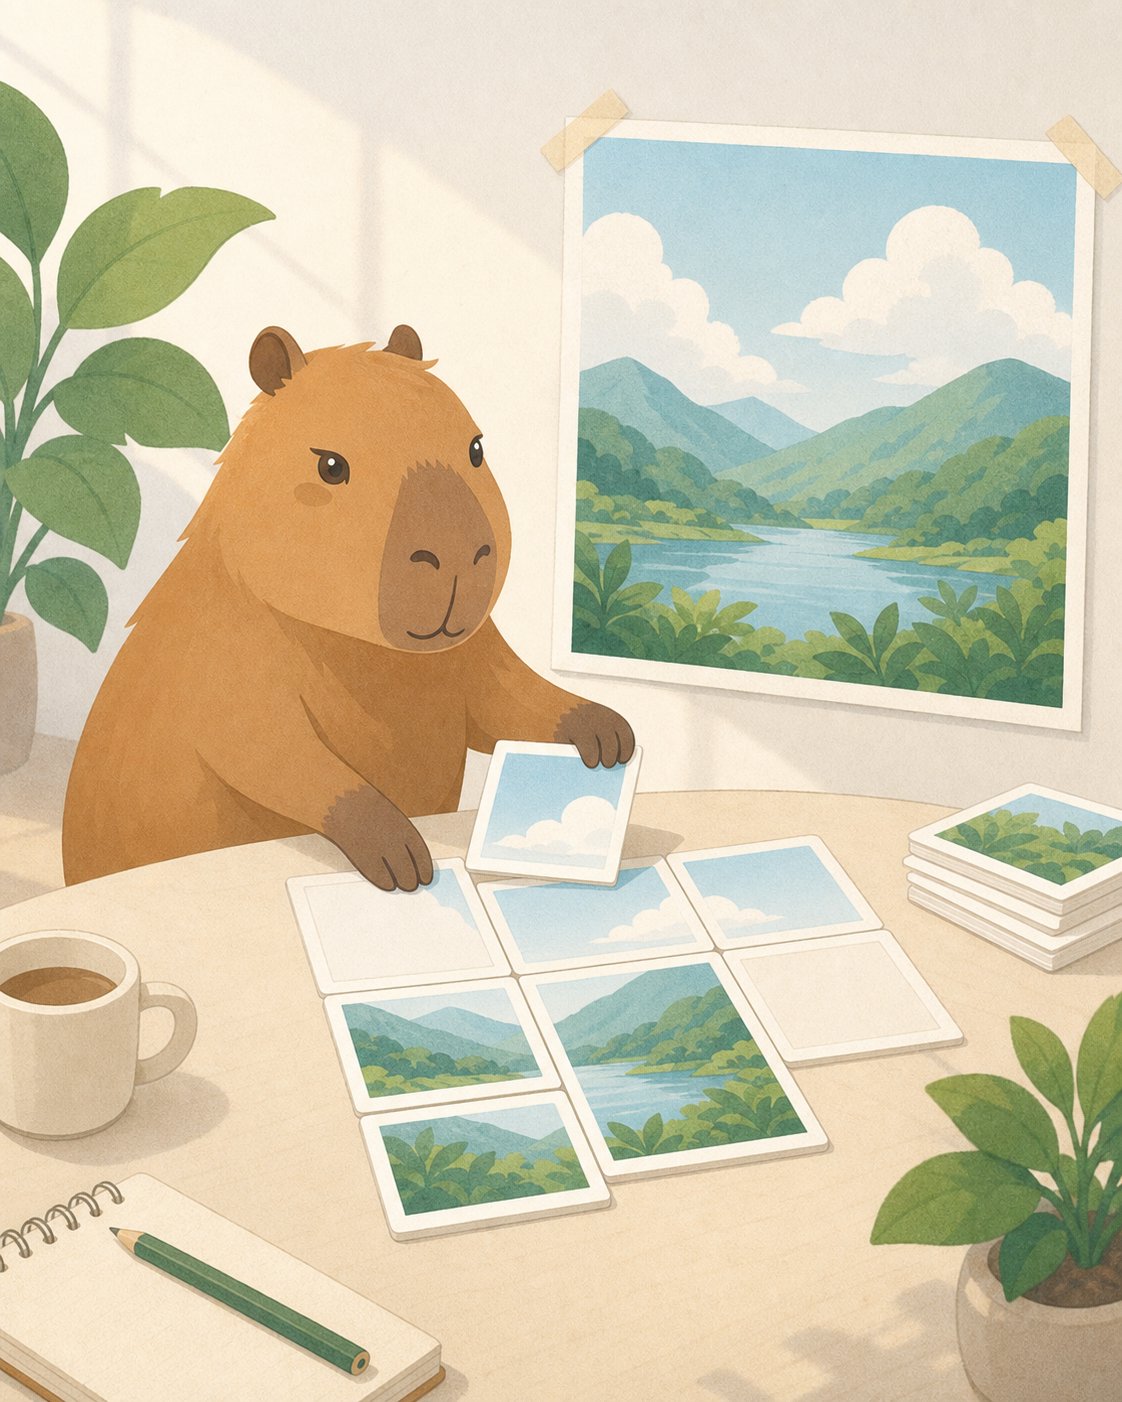
      <h3 style={{ margin: '0.35rem 0 0.55rem', fontSize: '1.3rem' }}>用文字生成一张文档封面图</h3>
      <p style={{ margin: '0 0 1rem', color: '#6e6861', fontSize: '0.95rem', lineHeight: 1.55 }}>从你想要的最终画面说起。Happycapy 可以生成图片，并把它和这个 Project 的其他文件保存在一起。</p>

      <div style={{ display: 'grid', gridTemplateColumns: 'repeat(auto-fit, minmax(240px, 1fr))', gap: '1.25rem', alignItems: 'stretch' }}>
        <div style={{ height: '100%', padding: '0.85rem', borderRadius: '9px', background: '#f8f6f2', color: '#4d4640', fontSize: '0.86rem', lineHeight: 1.55 }}>
          <p style={{ margin: '0 0 0.65rem', color: '#8a8178', fontWeight: 700 }}>告诉 Happycapy</p>
          <code style={{ whiteSpace: 'pre-wrap' }}>Create a 4:5 Happycapy-style illustration for a docs page about image generation.{"\n\n"}Show a calm capybara arranging blank image cards into one finished artwork. Use bright daylight, clean editorial illustration, paper grain, and no readable text.{"\n\n"}Save it as outputs/image-generation-cover.png.</code>
        </div>

        <div style={{ justifySelf: 'center', alignSelf: 'start', width: 'min(100%, 340px)', margin: 0 }}>
          <img src="https://mintcdn.com/happycapy/h9_vLtvDfrXu5HTP/images/features/image-generation-cover.png?fit=max&auto=format&n=h9_vLtvDfrXu5HTP&q=85&s=48b5fdecf36daa6805587c4d5d30ab86" alt="Happycapy 风格的图片生成文档示例图" style={{ display: 'block', width: '100%', margin: 0, aspectRatio: '4 / 5', objectFit: 'cover', borderRadius: '12px', border: '1px solid rgba(46, 41, 41, 0.1)', boxShadow: '0 18px 40px rgba(46, 41, 41, 0.08)' }} width="1122" height="1402" data-path="images/features/image-generation-cover.png" />
        </div>
      </div>
    </div>
  </div>
</div>

### 2. 编辑一张图片

上传一张图片，让 Happycapy 在保留关键主体的同时，修改细节、布局、背景、风格或局部区域。

<div style={{ display: 'grid', gridTemplateColumns: 'repeat(auto-fit, minmax(250px, 1fr))', gap: '1rem', margin: '1rem 0 2rem' }}>
  <div style={{ gridColumn: '1 / -1', border: '1px solid rgba(46, 41, 41, 0.1)', borderRadius: '12px', overflow: 'hidden', background: '#fffdf9' }}>
    <div style={{ padding: '1.1rem' }}>
      <div style={{ fontSize: '0.78rem', textTransform: 'uppercase', letterSpacing: '0.08em', color: '#df7657', fontWeight: 750 }}>Edit an image</div>
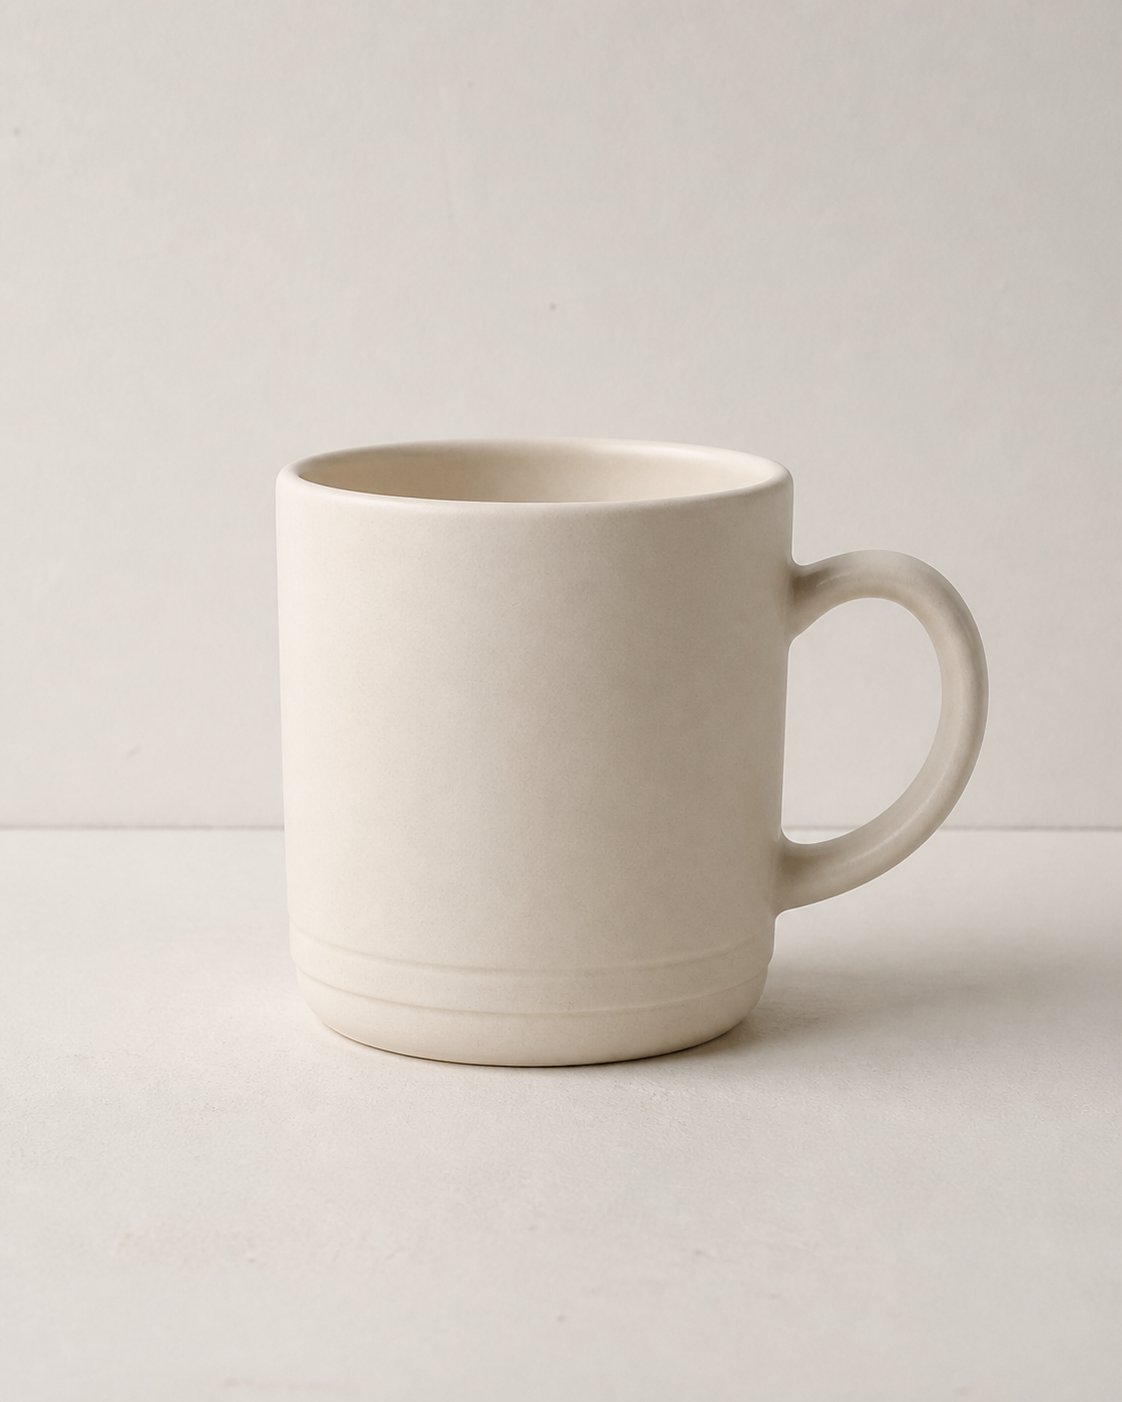
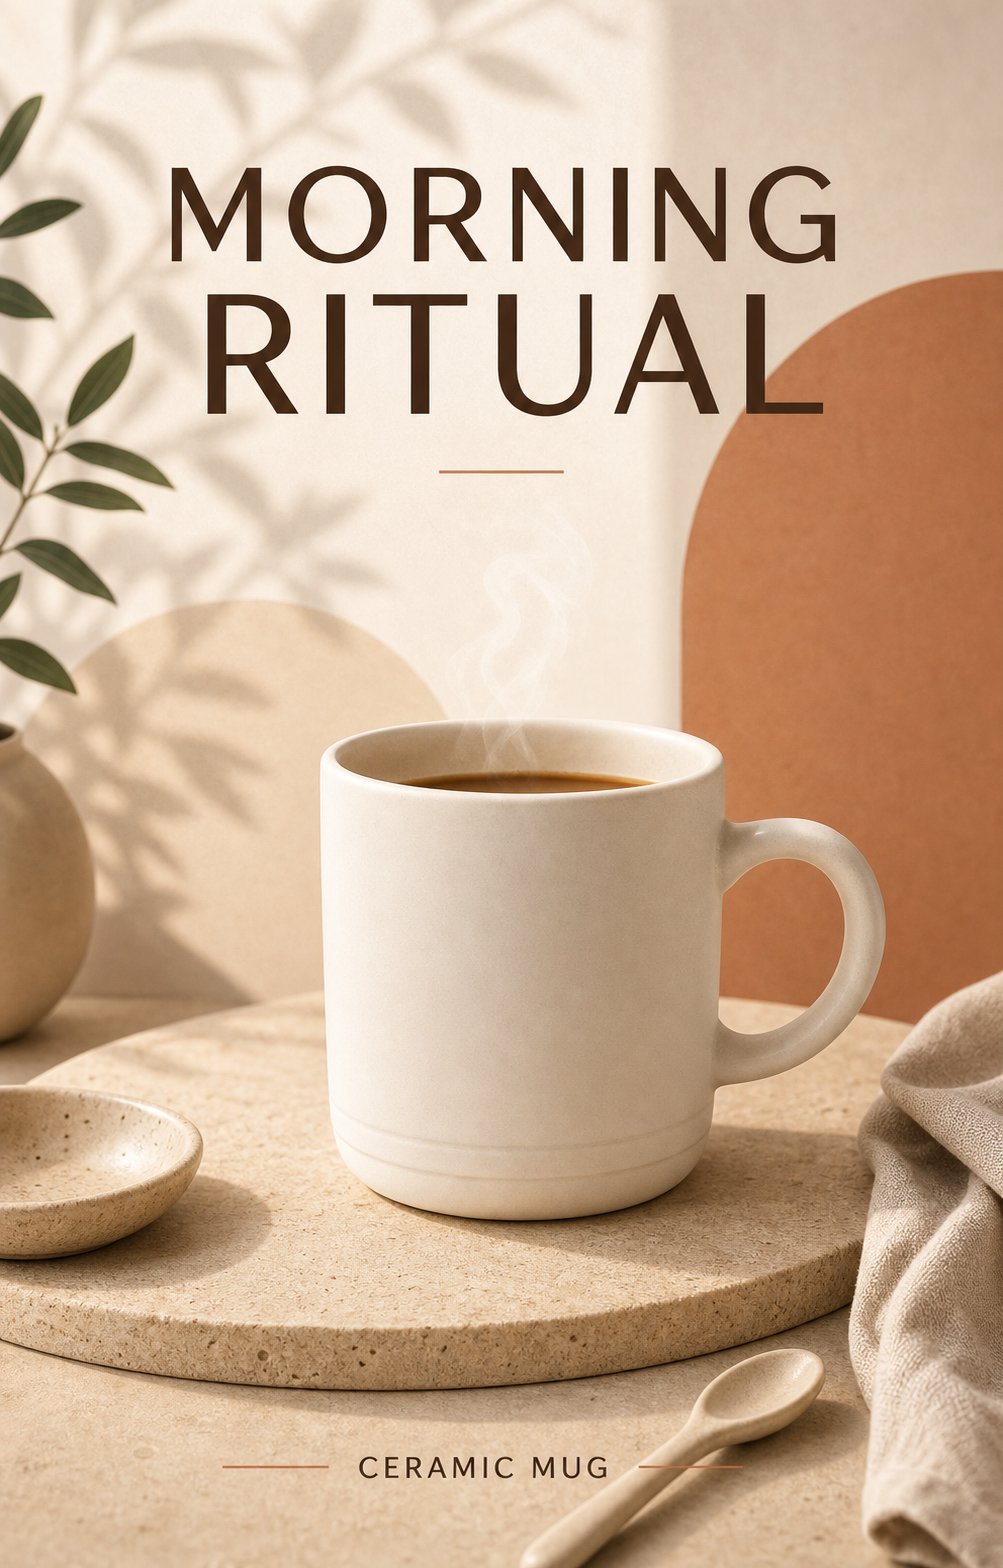
      <h3 style={{ margin: '0.35rem 0 0.55rem', fontSize: '1.3rem' }}>把普通产品图改成活动海报</h3>
      <p style={{ margin: '0 0 1rem', color: '#6e6861', fontSize: '0.95rem', lineHeight: 1.55 }}>上传一张简单产品图。让 Happycapy 保持产品可识别，同时改变版式、灯光、道具和海报文字。</p>

      <div style={{ display: 'grid', gridTemplateColumns: 'repeat(2, minmax(0, 1fr))', gap: '0.75rem', marginBottom: '1rem' }}>
        <div>
          <img src="https://mintcdn.com/happycapy/h9_vLtvDfrXu5HTP/images/features/image-edit-before-mug.png?fit=max&auto=format&n=h9_vLtvDfrXu5HTP&q=85&s=c9771a04ae657bda4f79e9184324364c" alt="编辑前的马克杯产品图" style={{ display: 'block', width: '100%', aspectRatio: '4 / 5', objectFit: 'cover', borderRadius: '12px', border: '1px solid rgba(46, 41, 41, 0.1)' }} width="1122" height="1402" data-path="images/features/image-edit-before-mug.png" />

          <div style={{ marginTop: '0.45rem', color: '#8a8178', fontSize: '0.78rem', fontWeight: 700, textTransform: 'uppercase', letterSpacing: '0.08em' }}>Before</div>
        </div>

        <div>
          <img src="https://mintcdn.com/happycapy/h9_vLtvDfrXu5HTP/images/features/image-edit-after-mug-poster.png?fit=max&auto=format&n=h9_vLtvDfrXu5HTP&q=85&s=8ae661da753de93bf6633785b41ff6da" alt="编辑后的马克杯活动海报" style={{ display: 'block', width: '100%', aspectRatio: '4 / 5', objectFit: 'cover', borderRadius: '12px', border: '1px solid rgba(46, 41, 41, 0.1)', boxShadow: '0 18px 40px rgba(46, 41, 41, 0.08)' }} width="1003" height="1568" data-path="images/features/image-edit-after-mug-poster.png" />

          <div style={{ marginTop: '0.45rem', color: '#df7657', fontSize: '0.78rem', fontWeight: 750, textTransform: 'uppercase', letterSpacing: '0.08em' }}>After</div>
        </div>
      </div>

      <div style={{ padding: '0.85rem', borderRadius: '9px', background: '#f8f6f2', color: '#4d4640', fontSize: '0.86rem', lineHeight: 1.55 }}>
        <p style={{ margin: '0 0 0.65rem', color: '#8a8178', fontWeight: 700 }}>告诉 Happycapy</p>
        <code style={{ whiteSpace: 'pre-wrap' }}>Edit the uploaded product photo.{"\n\n"}Keep the mug recognizable, but turn it into a 4:5 product campaign poster. Add clear poster typography with the headline “MORNING RITUAL” and the small label “CERAMIC MUG”.{"\n\n"}Use warm studio lighting, a premium editorial layout, soft shadows, and simple lifestyle props. Save it as outputs/mug-campaign-poster.png.</code>
      </div>
    </div>
  </div>
</div>

### 3. 组合多张参考图

上传多张图片，并告诉 Happycapy 每张图控制什么：品牌标识、主体、材质、氛围、版式或场景。

<div style={{ display: 'grid', gridTemplateColumns: 'repeat(auto-fit, minmax(250px, 1fr))', gap: '1rem', margin: '1rem 0 2rem' }}>
  <div style={{ gridColumn: '1 / -1', border: '1px solid rgba(46, 41, 41, 0.1)', borderRadius: '12px', overflow: 'hidden', background: '#fffdf9' }}>
    <div style={{ padding: '1.1rem' }}>
      <div style={{ fontSize: '0.78rem', textTransform: 'uppercase', letterSpacing: '0.08em', color: '#df7657', fontWeight: 750 }}>Multi-reference</div>
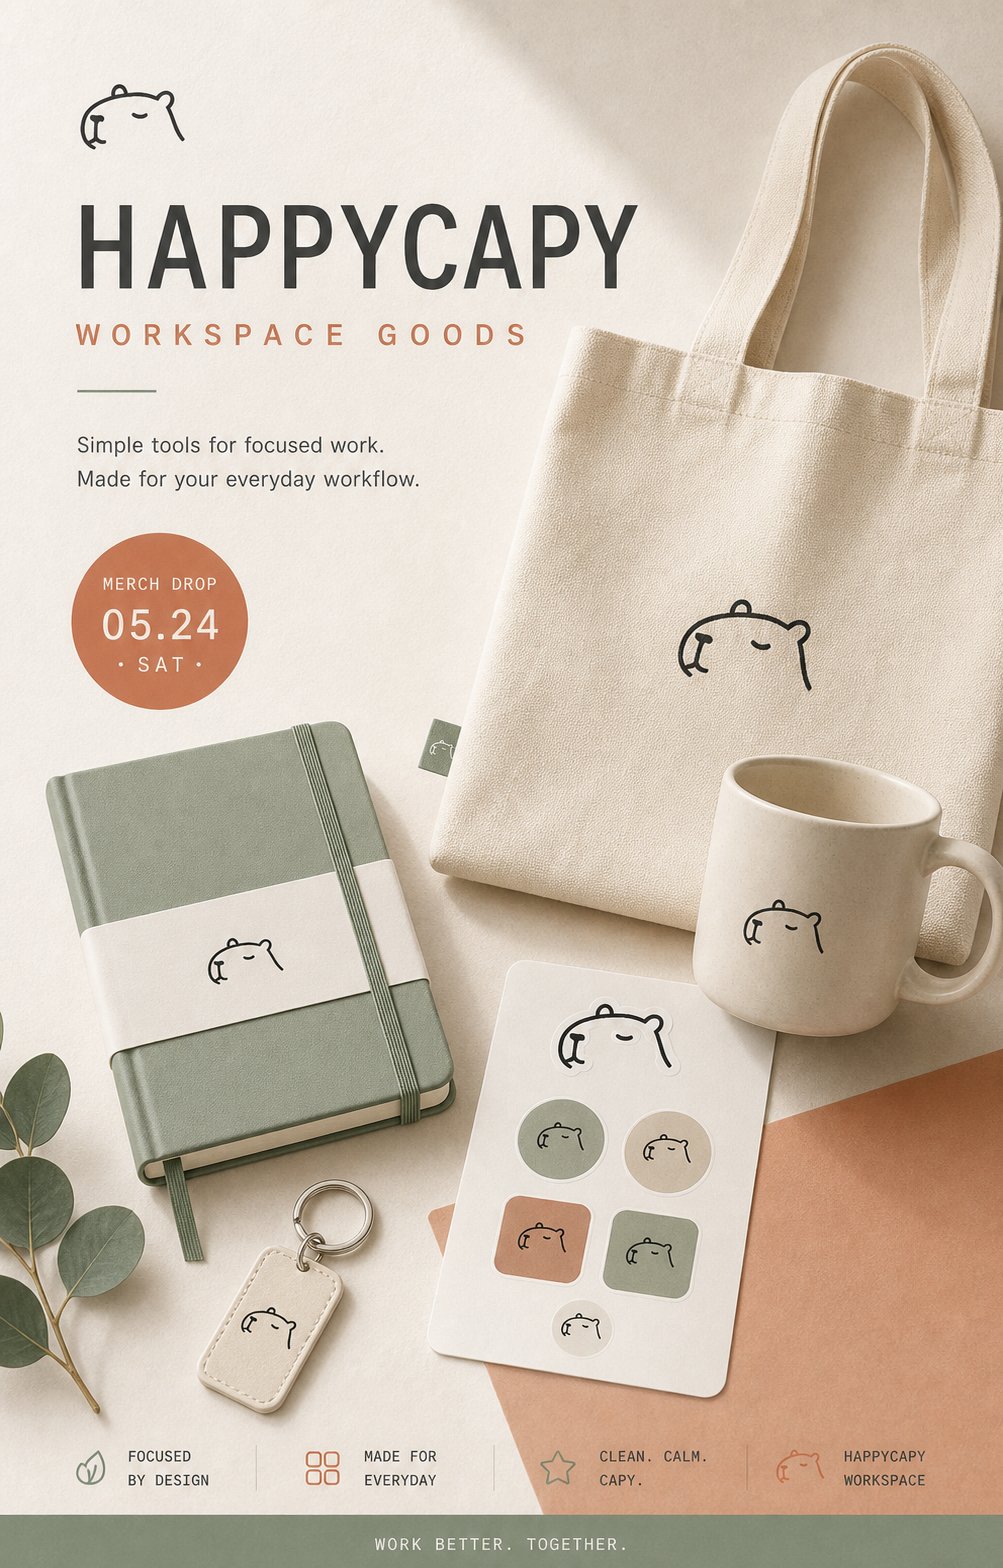
      <h3 style={{ margin: '0.35rem 0 0.55rem', fontSize: '1.3rem' }}>用三张参考图生成周边活动海报</h3>
      <p style={{ margin: '0 0 1rem', color: '#6e6861', fontSize: '0.95rem', lineHeight: 1.55 }}>一张图控制品牌标识，一张图控制周边物品，一张图控制活动氛围。关键是告诉 Happycapy 每张参考图各自负责什么。</p>

      <div style={{ display: 'grid', gridTemplateColumns: 'repeat(auto-fit, minmax(260px, 1fr))', gap: '1.25rem', alignItems: 'start' }}>
        <div style={{ display: 'grid', gap: '0.75rem' }}>
          <div style={{ display: 'grid', gridTemplateColumns: '84px minmax(0, 1fr)', gap: '0.75rem', alignItems: 'center', padding: '0.7rem', borderRadius: '10px', background: '#f8f6f2' }}>
            <img src="https://mintcdn.com/happycapy/h9_vLtvDfrXu5HTP/images/features/image-ref-happycapy-logo.png?fit=max&auto=format&n=h9_vLtvDfrXu5HTP&q=85&s=ff2087580b0aecea61c9d618db21db41" alt="Happycapy 标识参考图" style={{ display: 'block', width: '84px', height: '84px', objectFit: 'cover', borderRadius: '8px', border: '1px solid rgba(46, 41, 41, 0.1)' }} width="1254" height="1254" data-path="images/features/image-ref-happycapy-logo.png" />

            <div>
              <div style={{ color: '#df7657', fontSize: '0.78rem', fontWeight: 750, textTransform: 'uppercase', letterSpacing: '0.08em' }}>Image 1</div>
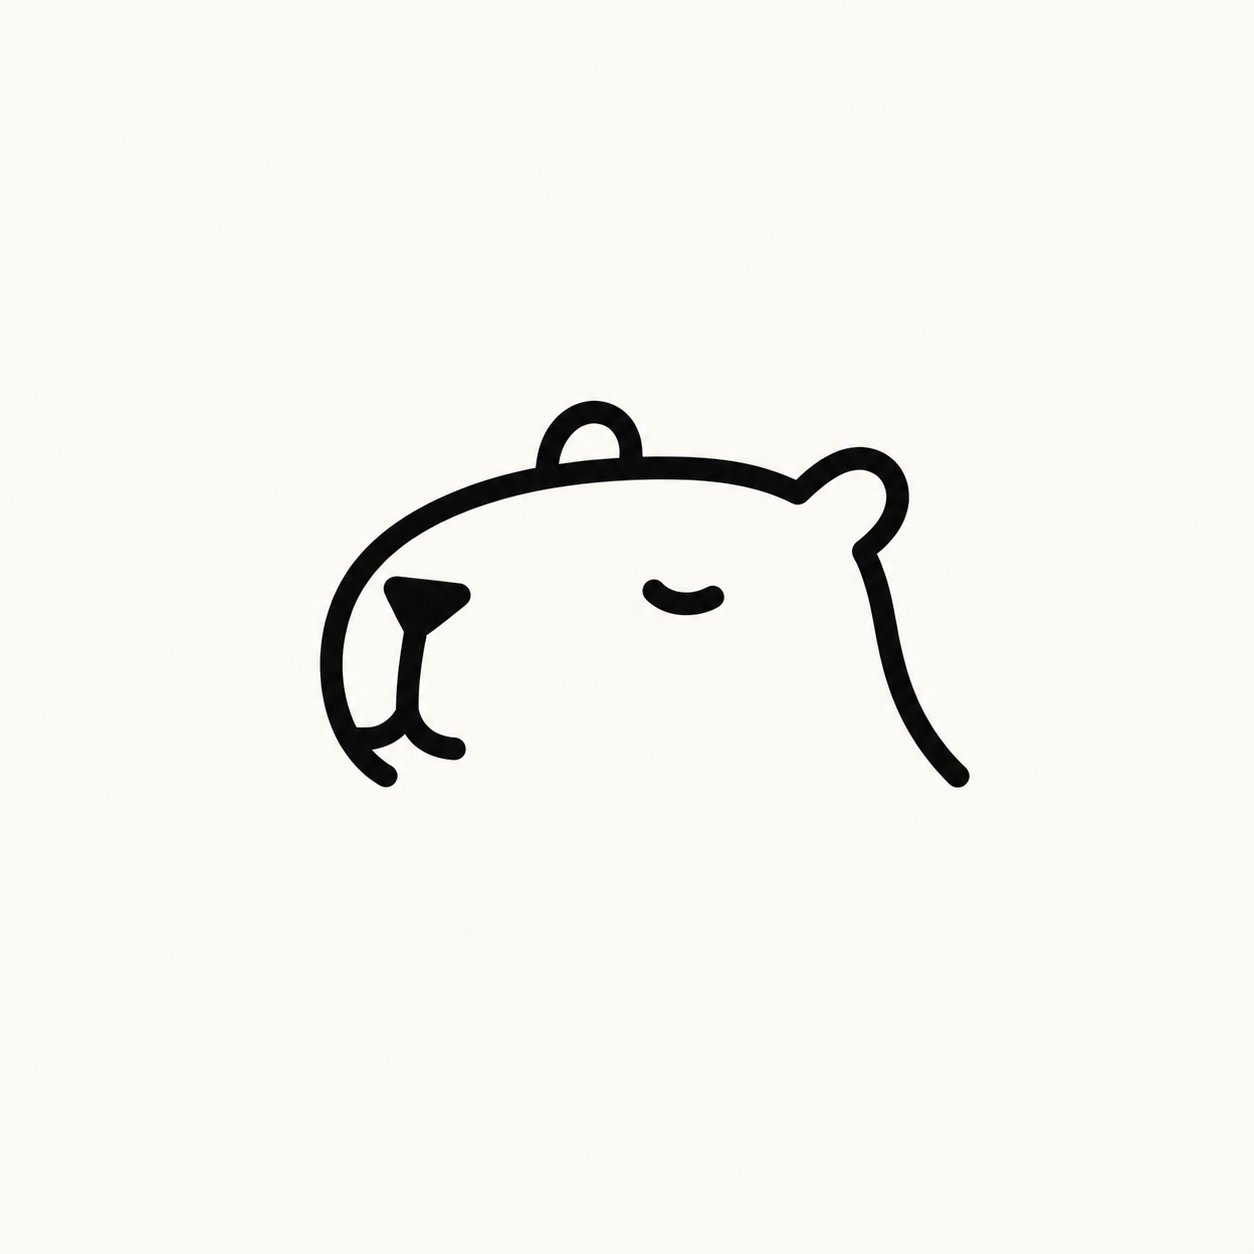
              <p style={{ margin: '0.2rem 0 0', color: '#4d4640', fontSize: '0.88rem', lineHeight: 1.45 }}>控制 Happycapy 的品牌标识和线条图标特征。</p>
            </div>
          </div>

          <div style={{ display: 'grid', gridTemplateColumns: '84px minmax(0, 1fr)', gap: '0.75rem', alignItems: 'center', padding: '0.7rem', borderRadius: '10px', background: '#f8f6f2' }}>
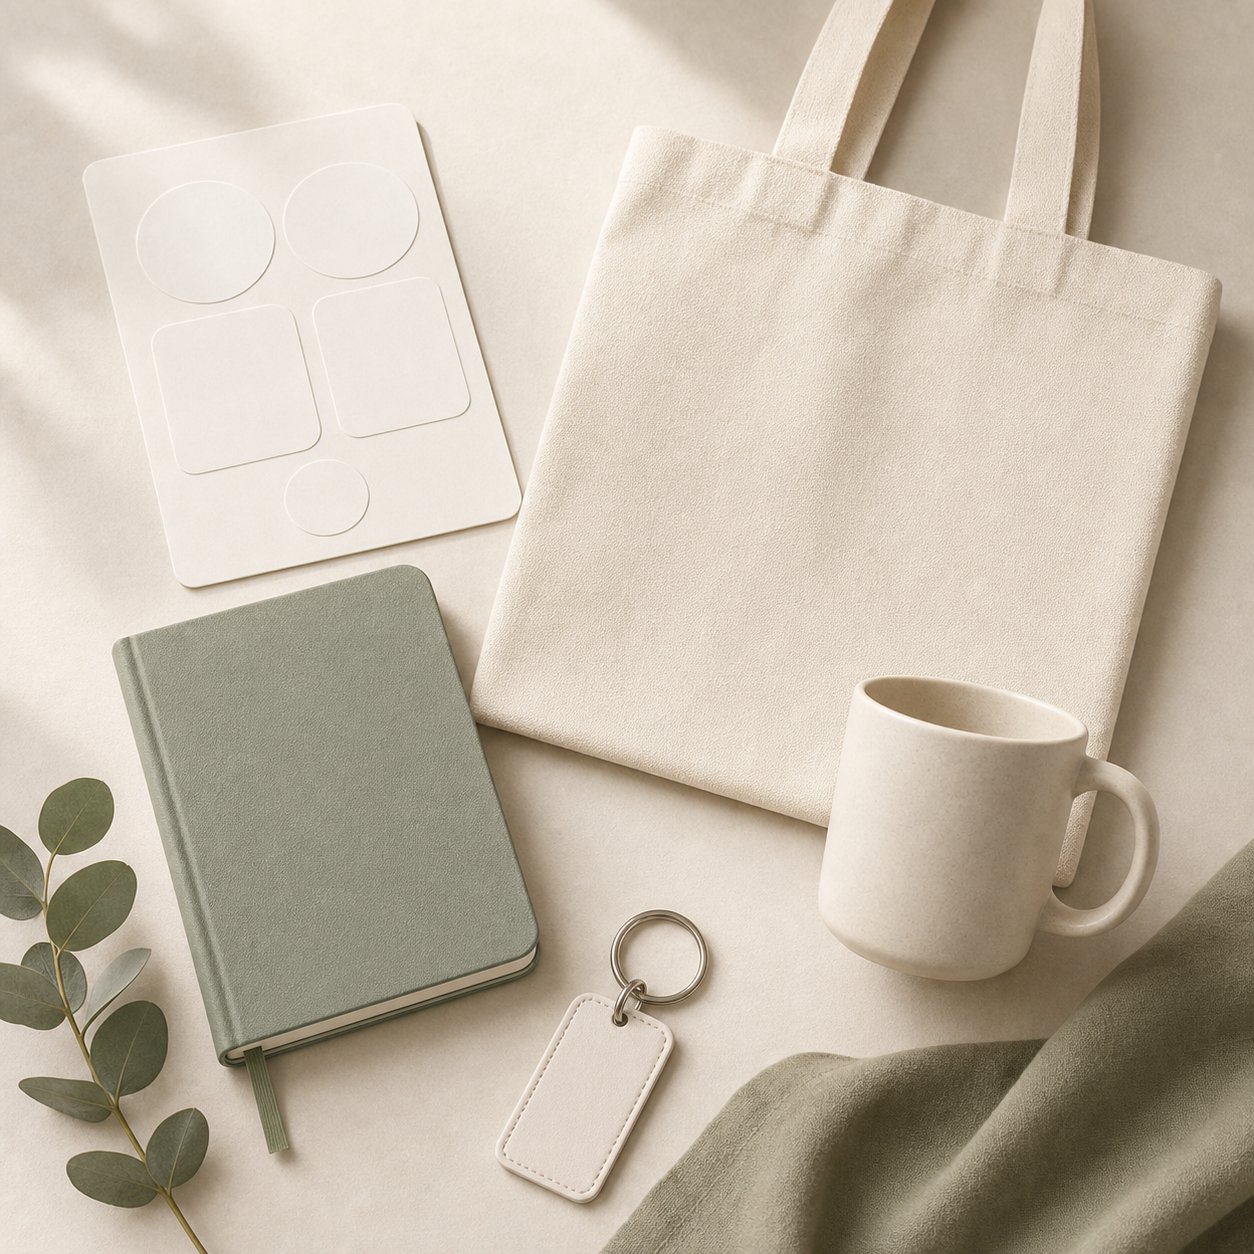
            <img src="https://mintcdn.com/happycapy/h9_vLtvDfrXu5HTP/images/features/image-ref-merch-objects.png?fit=max&auto=format&n=h9_vLtvDfrXu5HTP&q=85&s=ade0a16c4a6c926d10e030ac59f88dd5" alt="空白周边物品参考图" style={{ display: 'block', width: '84px', height: '84px', objectFit: 'cover', borderRadius: '8px', border: '1px solid rgba(46, 41, 41, 0.1)' }} width="1254" height="1254" data-path="images/features/image-ref-merch-objects.png" />

            <div>
              <div style={{ color: '#df7657', fontSize: '0.78rem', fontWeight: 750, textTransform: 'uppercase', letterSpacing: '0.08em' }}>Image 2</div>
              <p style={{ margin: '0.2rem 0 0', color: '#4d4640', fontSize: '0.88rem', lineHeight: 1.45 }}>控制周边物品、材质和产品视角。</p>
            </div>
          </div>

          <div style={{ display: 'grid', gridTemplateColumns: '84px minmax(0, 1fr)', gap: '0.75rem', alignItems: 'center', padding: '0.7rem', borderRadius: '10px', background: '#f8f6f2' }}>
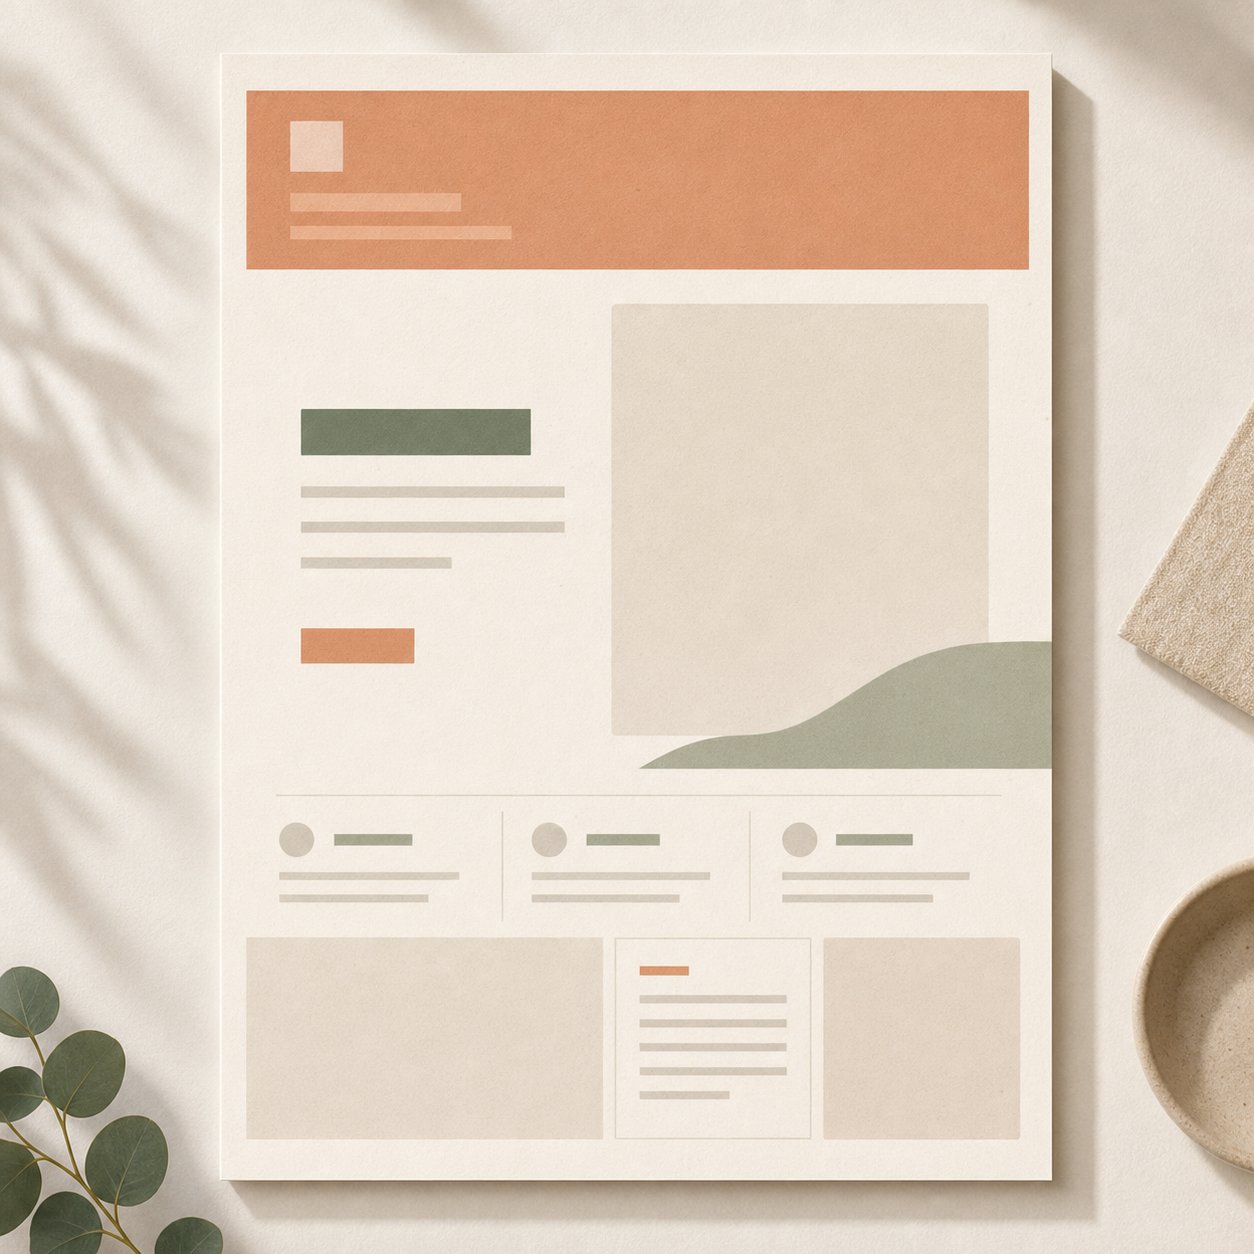
            <img src="https://mintcdn.com/happycapy/h9_vLtvDfrXu5HTP/images/features/image-ref-campaign-layout.png?fit=max&auto=format&n=h9_vLtvDfrXu5HTP&q=85&s=c50a41ca0494509b045195a9b4caa4fd" alt="活动版式和氛围参考图" style={{ display: 'block', width: '84px', height: '84px', objectFit: 'cover', borderRadius: '8px', border: '1px solid rgba(46, 41, 41, 0.1)' }} width="1254" height="1254" data-path="images/features/image-ref-campaign-layout.png" />

            <div>
              <div style={{ color: '#df7657', fontSize: '0.78rem', fontWeight: 750, textTransform: 'uppercase', letterSpacing: '0.08em' }}>Image 3</div>
              <p style={{ margin: '0.2rem 0 0', color: '#4d4640', fontSize: '0.88rem', lineHeight: 1.45 }}>控制海报氛围、配色、光线和版式。</p>
            </div>
          </div>
        </div>

        <div style={{ justifySelf: 'center', width: 'min(100%, 360px)' }}>
          <img src="https://mintcdn.com/happycapy/h9_vLtvDfrXu5HTP/images/features/image-output-happycapy-merch-poster.png?fit=max&auto=format&n=h9_vLtvDfrXu5HTP&q=85&s=ba7da75274a135ea40693b614999f892" alt="生成的 Happycapy 周边活动海报" style={{ display: 'block', width: '100%', aspectRatio: '4 / 5', objectFit: 'cover', objectPosition: 'center top', borderRadius: '12px', border: '1px solid rgba(46, 41, 41, 0.1)', boxShadow: '0 18px 40px rgba(46, 41, 41, 0.08)' }} width="1003" height="1568" data-path="images/features/image-output-happycapy-merch-poster.png" />
        </div>
      </div>

      <div style={{ marginTop: '1rem', padding: '0.85rem', borderRadius: '9px', background: '#f8f6f2', color: '#4d4640', fontSize: '0.86rem', lineHeight: 1.55 }}>
        <p style={{ margin: '0 0 0.65rem', color: '#8a8178', fontWeight: 700 }}>告诉 Happycapy</p>
        <code style={{ whiteSpace: 'pre-wrap' }}>Use image 1 as the Happycapy brand mark reference. Keep the simple capybara line icon recognizable, but use it as a tasteful logo on the products.{"\n\n"}Use image 2 to control the merch objects, materials, and product perspective. Use image 3 to control the campaign mood, color palette, lighting, and layout.{"\n\n"}Create one 4:5 editorial campaign poster for a fictional Happycapy merch drop. Show the logo applied to the merch objects in a clean, premium way. Save it as outputs/happycapy-merch-campaign.png.</code>
      </div>
    </div>
  </div>
</div>

## 相关资源

* [Files](/zh/features/files)：在 Project 里管理上传的参考图、生成图片和 `outputs/` 文件。
* [AI Image Generator](https://happycapy.ai/tools/ai-image-generator)：查看更多图片提示词思路，也可以直接尝试图片生成。