> ## Documentation Index
> Fetch the complete documentation index at: https://docs.happycapy.ai/llms.txt
> Use this file to discover all available pages before exploring further.
# Automations (Beta)
> 在 Project 中按排程執行重複工作
**Beta:** Automations 仍處於早期存取階段,功能會持續完善。
## Automations 是什麼
Automation 是一個按排程執行的 prompt,會在指定 Project 中運行。它可以使用 Project 裡的檔案、session 上下文和指示,然後儲存或傳送結果。
當一項工作會重複發生、有明確時間表,並且會產出需要你 review 的結果時,就適合用 Automation。
## 什麼時候使用 Automations
適合把 Automations 用在輸入清楚、輸出可重複的週期性工作上:
* 每日或每週摘要
* Project 狀態報告
* 定時檔案處理
* 週期性研究或監控
* 定期檢查 GitHub、Notion 或郵件
* 需要在你離開後繼續執行的工作
Automation prompt 越清楚越可靠。最好寫明目標、來源材料、輸出格式,以及沒有新內容時要怎麼處理。
## 建立 Automation
你可以從側邊欄建立 Automation,也可以直接在 Project 對話裡讓 Happycapy 建立。
Automations
按計畫執行重複工作。
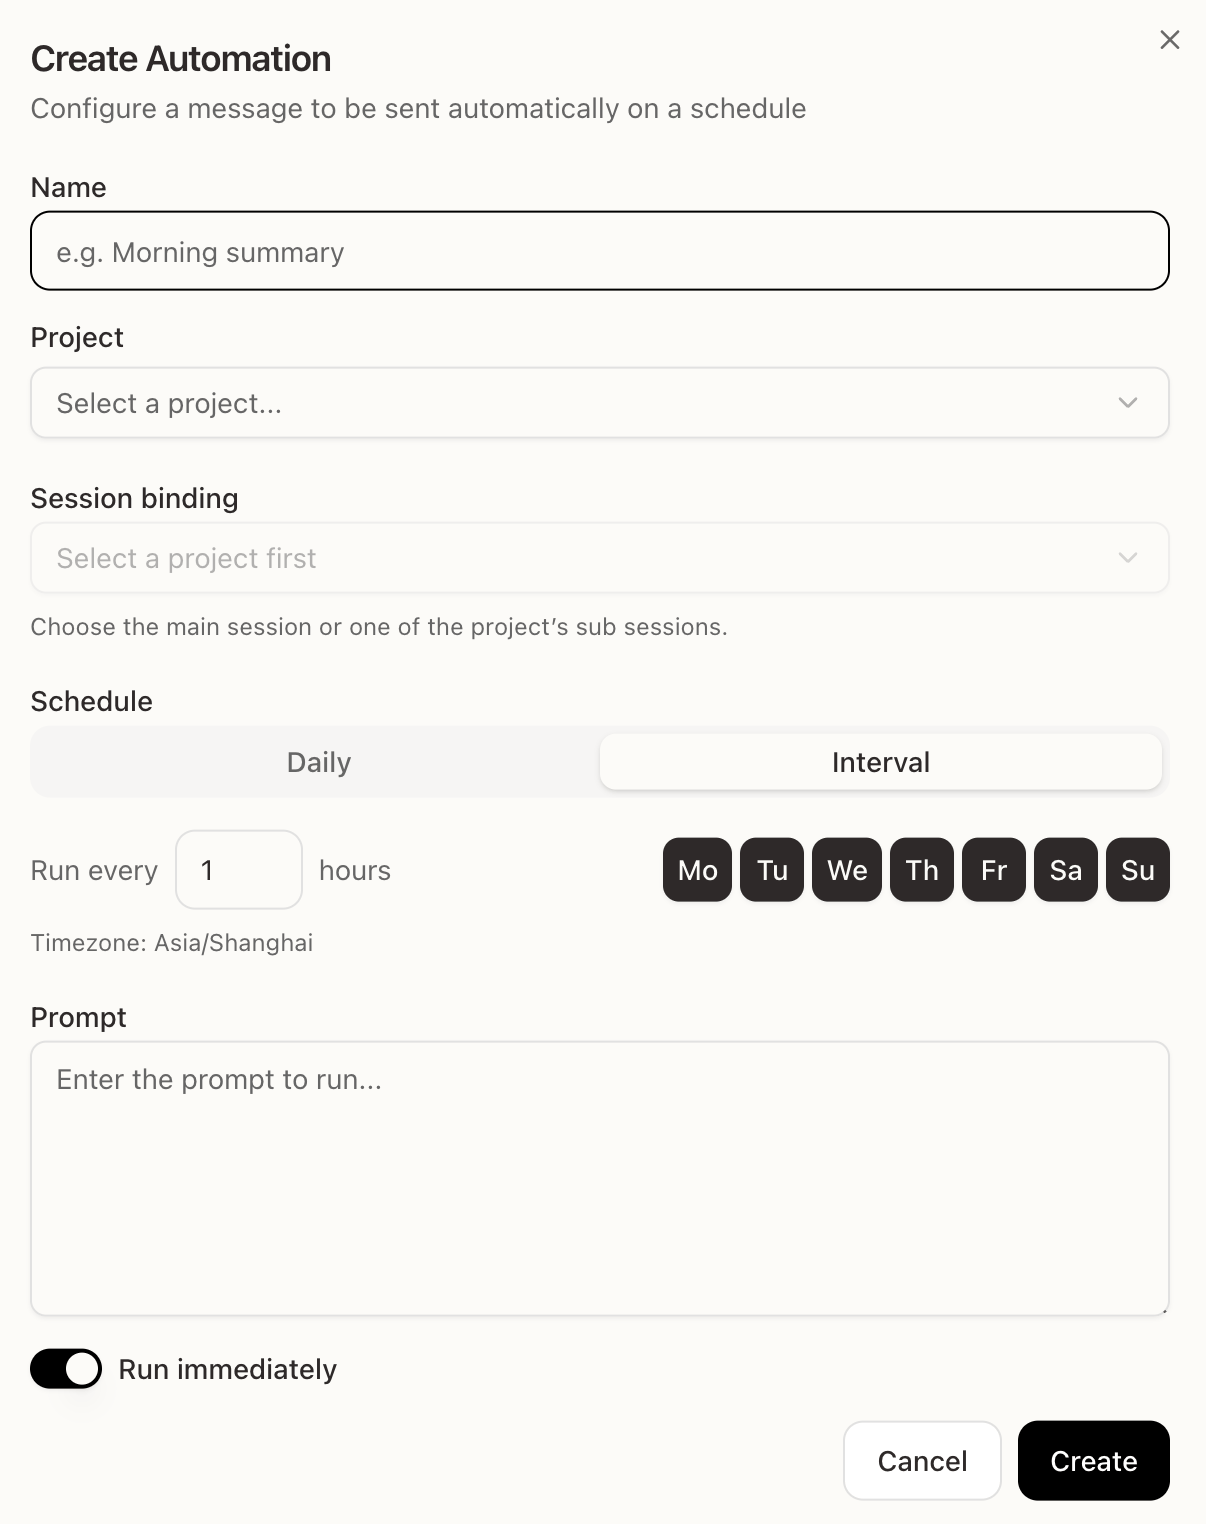
如果從側邊欄開始,點擊 **Automations**,然後點擊 **Create Automation**。
如果在 Project 對話中建立,直接描述要執行什麼、什麼時候執行:
```text theme={null}
建立一個 Automation,每週五下午 4 點總結這個 Project,並把報告儲存到 outputs/。
```
填寫:
* **Name** — 簡短名稱,例如 "Morning summary"
* **Project** — Automation 要執行的 Project
* **Session binding** — 綁定主 session,或該 Project 下的某個 session
* **Schedule** — 每天固定時間執行,或按間隔執行
* **Prompt** — Happycapy 每次要執行的指令
* **Run immediately** — 除了按排程執行,也立即測試一次
點擊 **Create** 儲存。
## 每個欄位的含義
* **Project** 讓 Automation 綁定到正確的工作區和檔案。
* **Session binding** 決定 prompt 從哪個 session 上下文繼續執行。
* **Schedule** 控制 Automation 什麼時候執行。
* **Prompt** 是 Happycapy 每次執行的指令。
* **Run immediately** 可以在真正依賴排程任務前,先執行一次測試。
## 寫一個可靠的 prompt
Automation 會自動重複執行,所以 prompt 應該能獨立說清楚任務。
* 寫明目標和輸出格式。
* 說明要檢查的檔案、資料夾或服務。
* 告訴 Happycapy 結果要儲存或傳送到哪裡。
* 加上兜底規則,例如「如果沒有新內容,寫一條簡短的無更新說明」。
## 範例
### 早間簡報
```text theme={null}
抓取 AI、創業和產品設計領域的熱門新聞。
過濾掉標題黨。每條新聞用一句話總結。
生成 HTML 簡報並寄到我的信箱。
```
### Project 狀態報告
```text theme={null}
總結這個 Project 過去一週完成的所有工作。
列出已完成任務、未解決問題和下一步計畫。
生成報告並儲存到 outputs/。
```
### GitHub review 檢查
```text theme={null}
檢查 my-org/my-repo 裡所有 open 的 PR。
列出需要我 review 或有新留言的 PR。
把摘要發布到這個 Project。
```
### 檔案處理
```text theme={null}
每個工作日檢查 uploads 資料夾裡是否有新的 CSV 檔案。
清理並總結所有新資料。
把摘要儲存到 outputs/daily-data-summary.md。
如果沒有新檔案,寫一條簡短的無更新說明。
```
prompt 會像普通 session 訊息一樣執行。只要步驟可重複,你在 Project 裡手動完成的事,通常都可以變成 Automation。