> ## Documentation Index
> Fetch the complete documentation index at: https://docs.happycapy.ai/llms.txt
> Use this file to discover all available pages before exploring further.

# 이미지 생성 및 편집

> Project 안에서 이미지를 생성, 수정, 조합하고 참고 이미지를 준비합니다

## 이미지 생성 및 편집이란?

이미지 생성 및 편집은 Project 안에서 새 이미지를 만들고, 기존 이미지를 수정하고, 여러 시각 참고 자료를 하나의 결과로 조합하는 기능입니다. 커버 이미지, 제품 비주얼, 캠페인 소재, 비디오 참고 프레임, 프로젝트 파일과 함께 보관할 정적 이미지에 사용할 수 있습니다.

모델 이름이 아니라 원하는 결과부터 설명하세요. Happycapy는 적절한 경로를 선택하고, 결과를 Files에 저장하며, 프롬프트와 참고 이미지와 생성 결과를 같은 Project에 모아 이후 세션에서도 이어갈 수 있게 합니다.

## 세 가지 시작 방식

이미 가지고 있는 입력에 맞춰 시작하세요: 텍스트, 이미지 한 장, 또는 여러 참고 이미지입니다.

### 1. 텍스트에서 시작하기

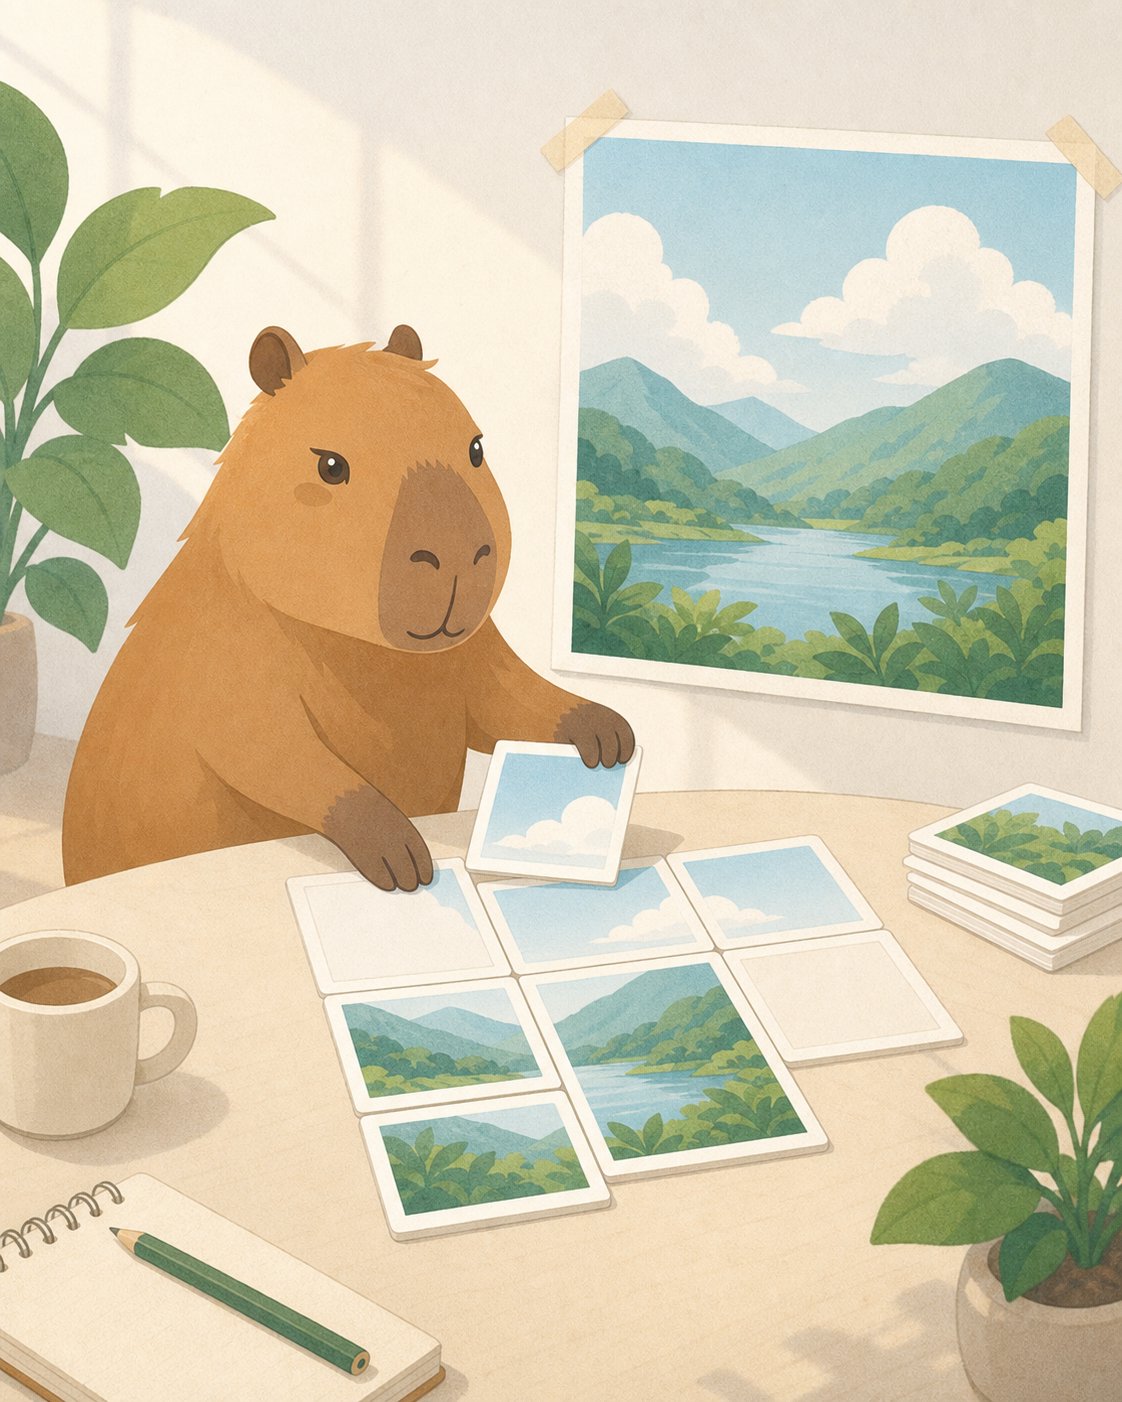
원하는 이미지를 설명하세요. Happycapy가 이미지를 생성하고 다른 Project 파일과 함께 저장할 수 있습니다.

<div style={{ display: 'grid', gridTemplateColumns: 'repeat(auto-fit, minmax(250px, 1fr))', gap: '1rem', margin: '1rem 0 2rem' }}>
  <div style={{ gridColumn: '1 / -1', border: '1px solid rgba(46, 41, 41, 0.1)', borderRadius: '12px', overflow: 'hidden', background: '#fffdf9' }}>
    <div style={{ padding: '1.1rem' }}>
      <div style={{ fontSize: '0.78rem', textTransform: 'uppercase', letterSpacing: '0.08em', color: '#df7657', fontWeight: 750 }}>Text to image</div>
      <h3 style={{ margin: '0.35rem 0 0.55rem', fontSize: '1.3rem' }}>텍스트로 문서 커버 이미지 만들기</h3>
      <p style={{ margin: '0 0 1rem', color: '#6e6861', fontSize: '0.95rem', lineHeight: 1.55 }}>원하는 완성 이미지부터 설명하세요. Happycapy가 이미지를 만들고 나머지 Project 파일과 함께 저장할 수 있습니다.</p>

      <div style={{ display: 'grid', gridTemplateColumns: 'repeat(auto-fit, minmax(240px, 1fr))', gap: '1.25rem', alignItems: 'stretch' }}>
        <div style={{ height: '100%', padding: '0.85rem', borderRadius: '9px', background: '#f8f6f2', color: '#4d4640', fontSize: '0.86rem', lineHeight: 1.55 }}>
          <p style={{ margin: '0 0 0.65rem', color: '#8a8178', fontWeight: 700 }}>Happycapy에게 요청하기</p>
          <code style={{ whiteSpace: 'pre-wrap' }}>Create a 4:5 Happycapy-style illustration for a docs page about image generation.{"\n\n"}Show a calm capybara arranging blank image cards into one finished artwork. Use bright daylight, clean editorial illustration, paper grain, and no readable text.{"\n\n"}Save it as outputs/image-generation-cover.png.</code>
        </div>

        <div style={{ justifySelf: 'center', alignSelf: 'start', width: 'min(100%, 340px)', margin: 0 }}>
          <img src="https://mintcdn.com/happycapy/h9_vLtvDfrXu5HTP/images/features/image-generation-cover.png?fit=max&auto=format&n=h9_vLtvDfrXu5HTP&q=85&s=48b5fdecf36daa6805587c4d5d30ab86" alt="이미지 생성 문서용 Happycapy 스타일 생성 일러스트" style={{ display: 'block', width: '100%', margin: 0, aspectRatio: '4 / 5', objectFit: 'cover', borderRadius: '12px', border: '1px solid rgba(46, 41, 41, 0.1)', boxShadow: '0 18px 40px rgba(46, 41, 41, 0.08)' }} width="1122" height="1402" data-path="images/features/image-generation-cover.png" />
        </div>
      </div>
    </div>
  </div>
</div>

### 2. 이미지 한 장 편집하기

이미지를 업로드하고, 중요한 부분은 유지하면서 세부 요소, 레이아웃, 배경, 스타일 또는 특정 영역을 바꾸도록 Happycapy에게 요청하세요.

<div style={{ display: 'grid', gridTemplateColumns: 'repeat(auto-fit, minmax(250px, 1fr))', gap: '1rem', margin: '1rem 0 2rem' }}>
  <div style={{ gridColumn: '1 / -1', border: '1px solid rgba(46, 41, 41, 0.1)', borderRadius: '12px', overflow: 'hidden', background: '#fffdf9' }}>
    <div style={{ padding: '1.1rem' }}>
      <div style={{ fontSize: '0.78rem', textTransform: 'uppercase', letterSpacing: '0.08em', color: '#df7657', fontWeight: 750 }}>Edit an image</div>
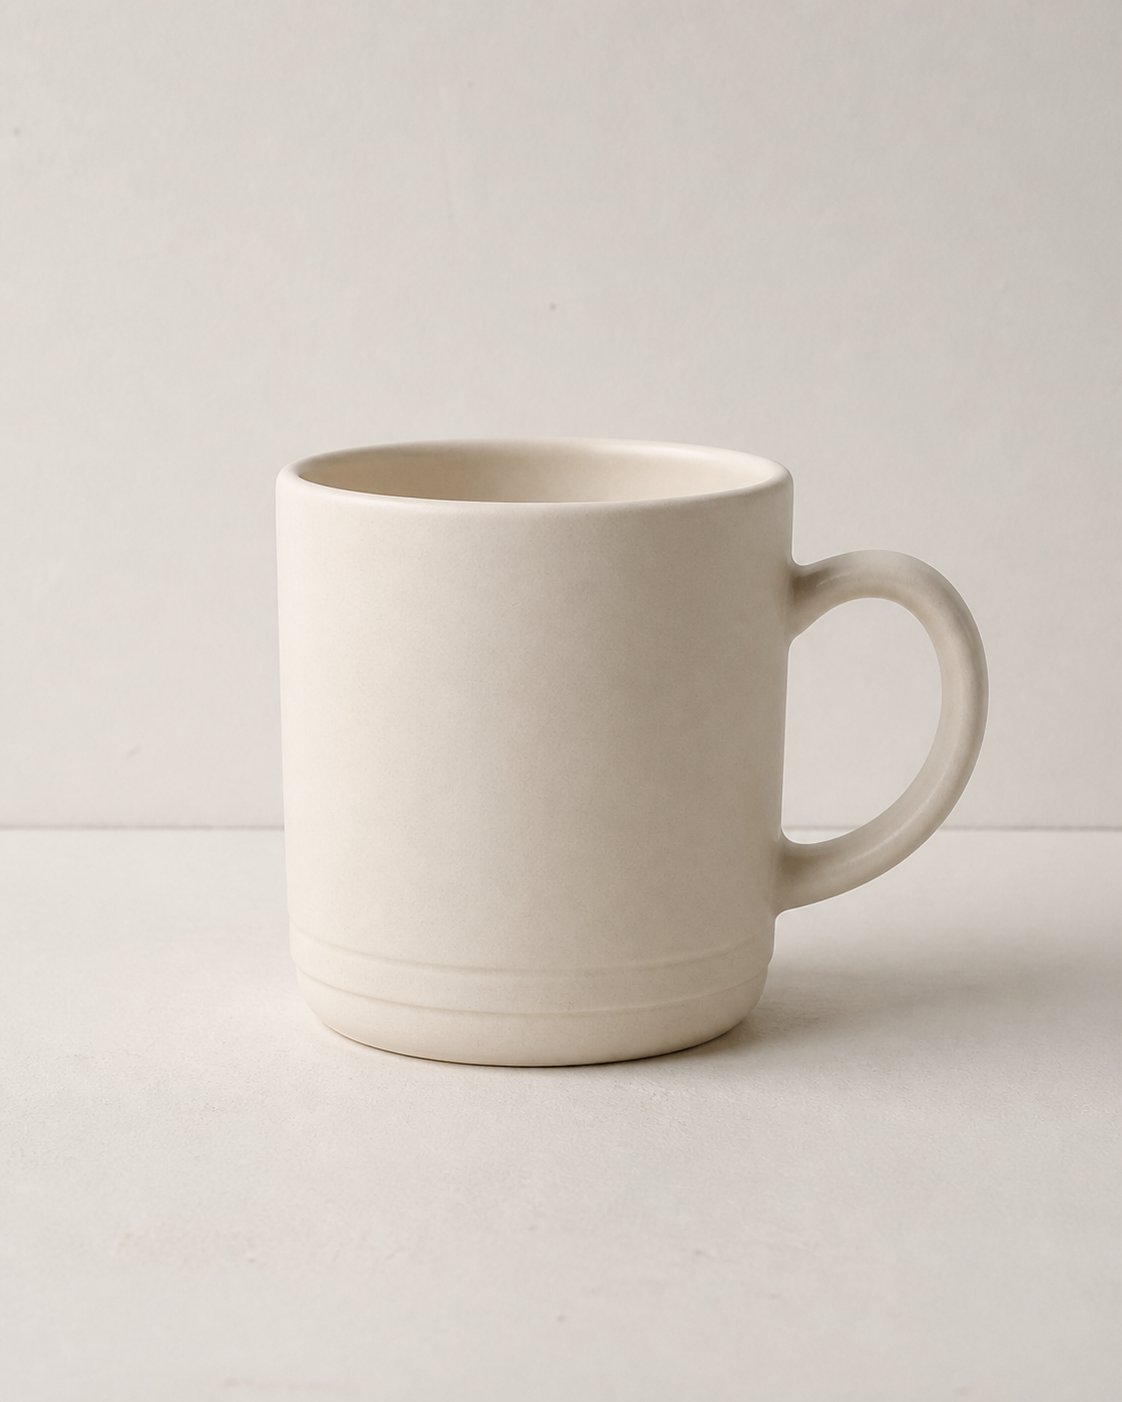
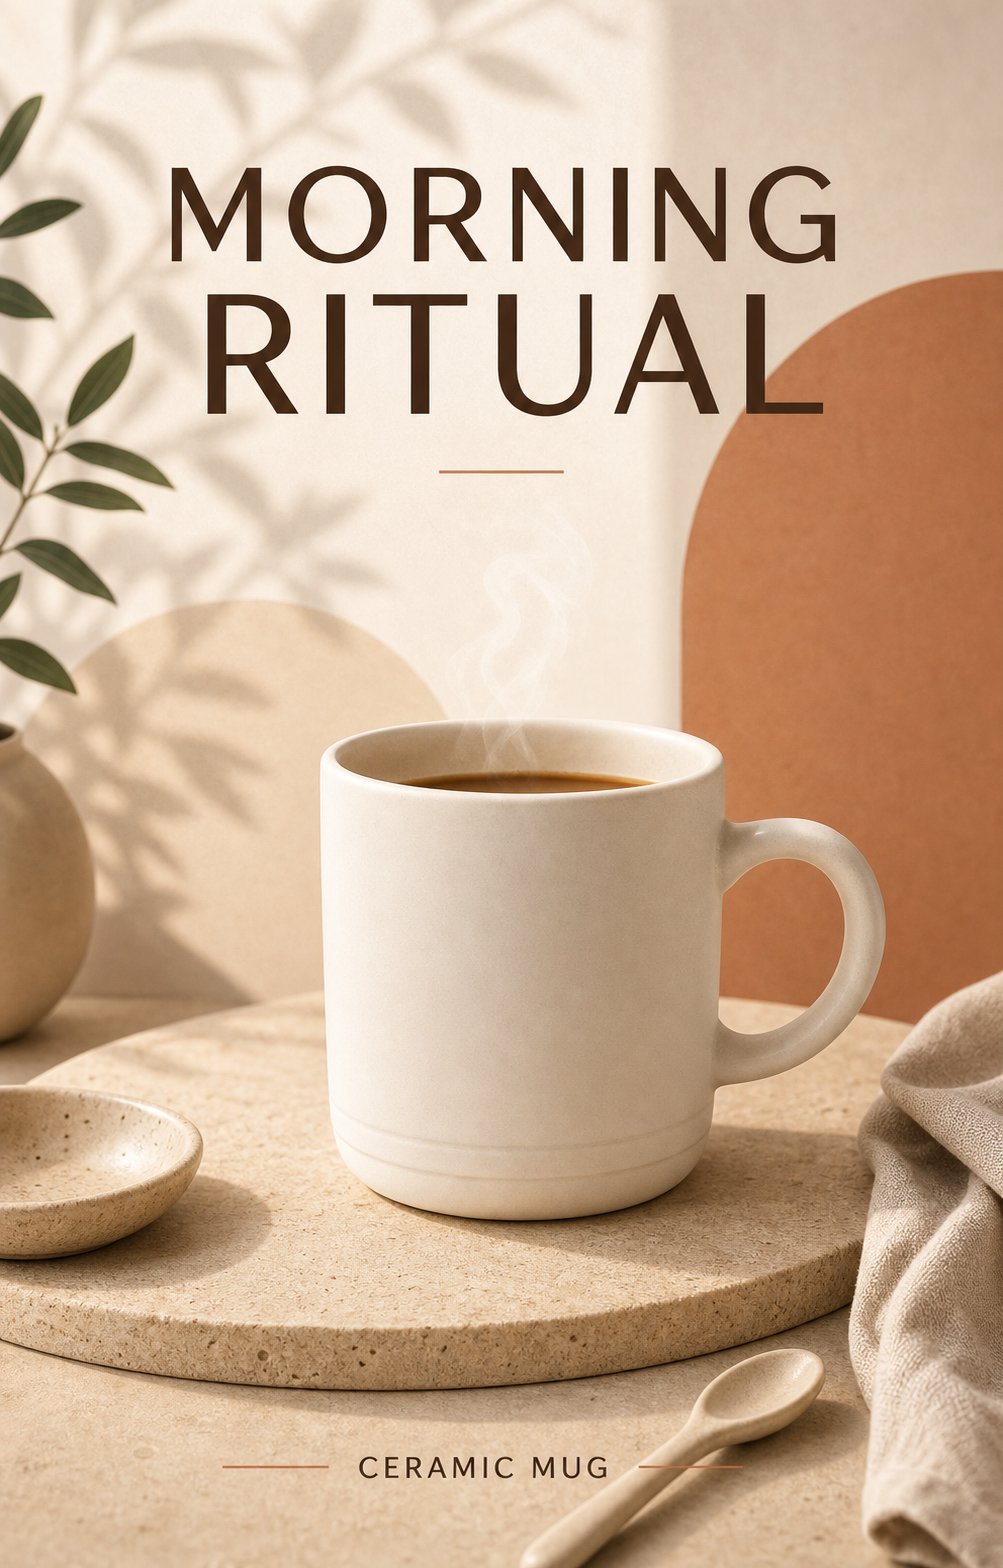
      <h3 style={{ margin: '0.35rem 0 0.55rem', fontSize: '1.3rem' }}>평범한 제품 사진을 캠페인 포스터로 바꾸기</h3>
      <p style={{ margin: '0 0 1rem', color: '#6e6861', fontSize: '0.95rem', lineHeight: 1.55 }}>간단한 제품 사진을 업로드하세요. Happycapy에게 제품은 알아볼 수 있게 유지하고, 레이아웃, 조명, 소품, 포스터 타이포그래피를 바꾸도록 요청합니다.</p>

      <div style={{ display: 'grid', gridTemplateColumns: 'repeat(2, minmax(0, 1fr))', gap: '0.75rem', marginBottom: '1rem' }}>
        <div>
          <img src="https://mintcdn.com/happycapy/h9_vLtvDfrXu5HTP/images/features/image-edit-before-mug.png?fit=max&auto=format&n=h9_vLtvDfrXu5HTP&q=85&s=c9771a04ae657bda4f79e9184324364c" alt="편집 전 평범한 머그 제품 사진" style={{ display: 'block', width: '100%', aspectRatio: '4 / 5', objectFit: 'cover', borderRadius: '12px', border: '1px solid rgba(46, 41, 41, 0.1)' }} width="1122" height="1402" data-path="images/features/image-edit-before-mug.png" />

          <div style={{ marginTop: '0.45rem', color: '#8a8178', fontSize: '0.78rem', fontWeight: 700, textTransform: 'uppercase', letterSpacing: '0.08em' }}>Before</div>
        </div>

        <div>
          <img src="https://mintcdn.com/happycapy/h9_vLtvDfrXu5HTP/images/features/image-edit-after-mug-poster.png?fit=max&auto=format&n=h9_vLtvDfrXu5HTP&q=85&s=8ae661da753de93bf6633785b41ff6da" alt="머그 제품 사진을 편집한 캠페인 포스터" style={{ display: 'block', width: '100%', aspectRatio: '4 / 5', objectFit: 'cover', borderRadius: '12px', border: '1px solid rgba(46, 41, 41, 0.1)', boxShadow: '0 18px 40px rgba(46, 41, 41, 0.08)' }} width="1003" height="1568" data-path="images/features/image-edit-after-mug-poster.png" />

          <div style={{ marginTop: '0.45rem', color: '#df7657', fontSize: '0.78rem', fontWeight: 750, textTransform: 'uppercase', letterSpacing: '0.08em' }}>After</div>
        </div>
      </div>

      <div style={{ padding: '0.85rem', borderRadius: '9px', background: '#f8f6f2', color: '#4d4640', fontSize: '0.86rem', lineHeight: 1.55 }}>
        <p style={{ margin: '0 0 0.65rem', color: '#8a8178', fontWeight: 700 }}>Happycapy에게 요청하기</p>
        <code style={{ whiteSpace: 'pre-wrap' }}>Edit the uploaded product photo.{"\n\n"}Keep the mug recognizable, but turn it into a 4:5 product campaign poster. Add clear poster typography with the headline “MORNING RITUAL” and the small label “CERAMIC MUG”.{"\n\n"}Use warm studio lighting, a premium editorial layout, soft shadows, and simple lifestyle props. Save it as outputs/mug-campaign-poster.png.</code>
      </div>
    </div>
  </div>
</div>

### 3. 여러 참고 이미지 조합하기

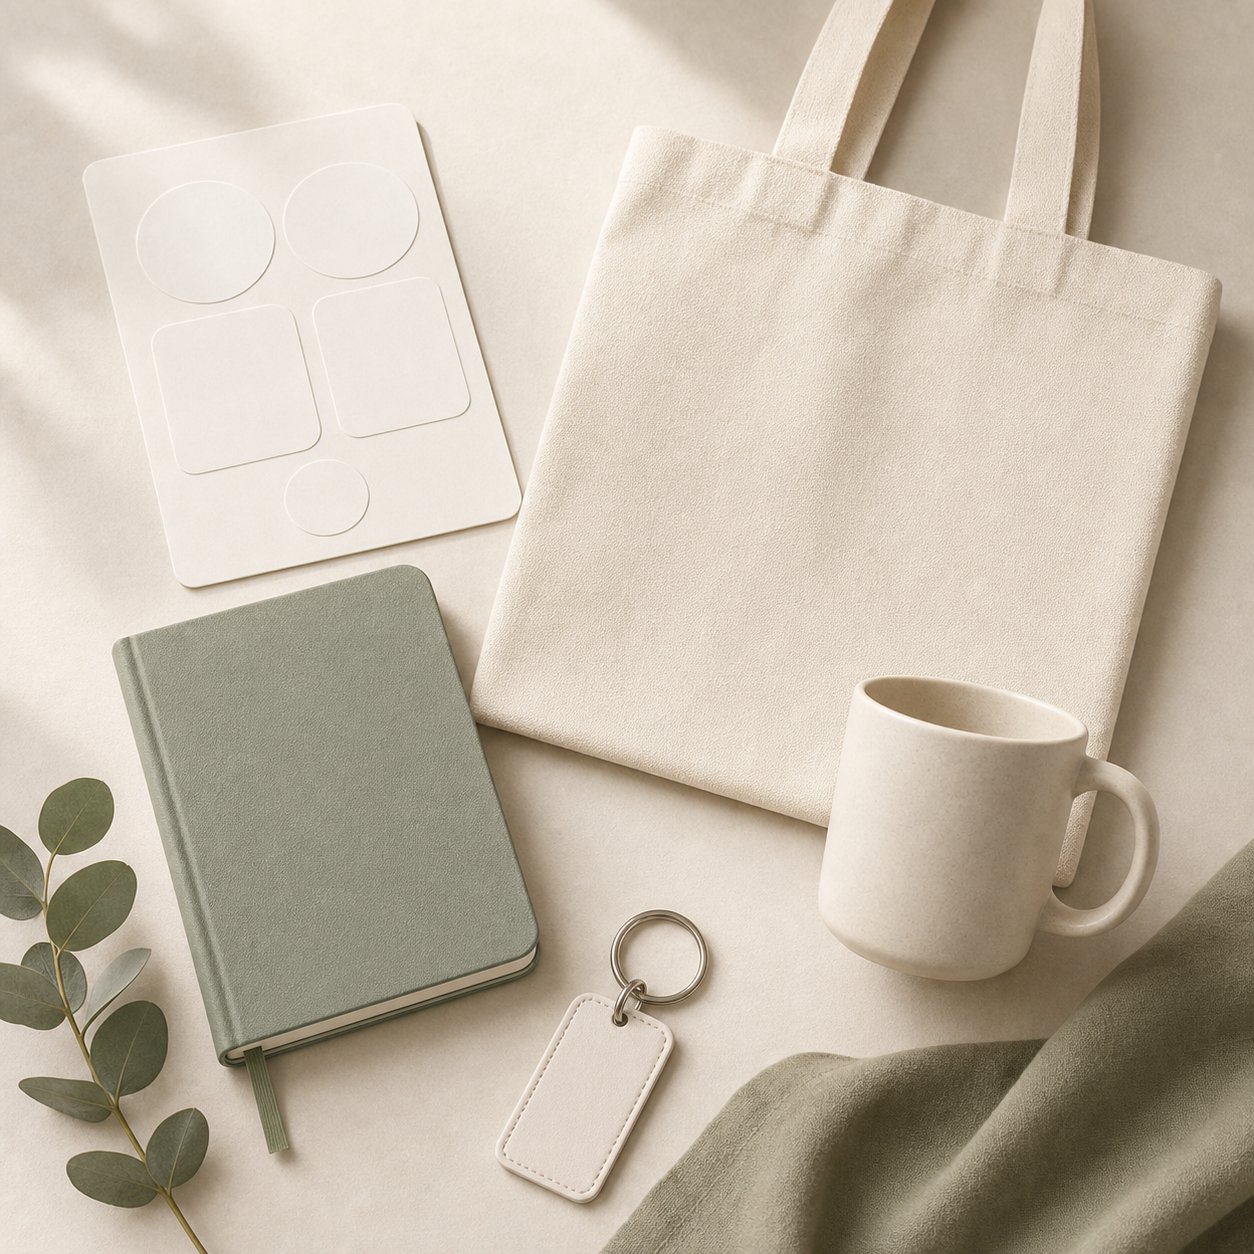
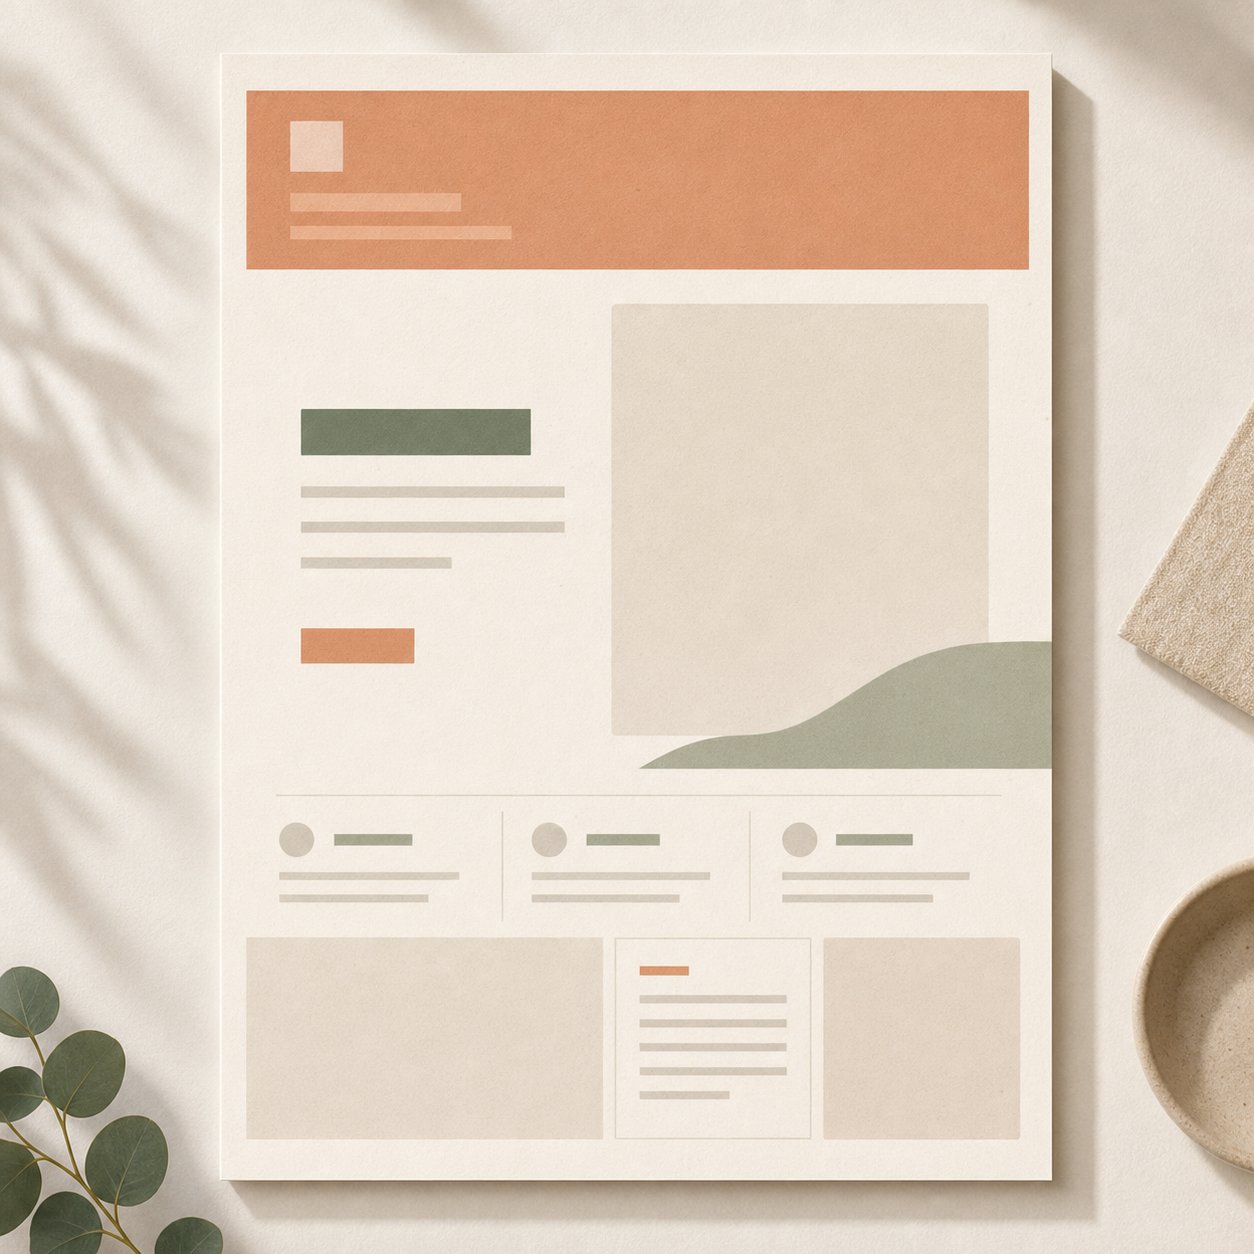
여러 이미지를 업로드하고 각 이미지가 무엇을 제어하는지 Happycapy에게 알려주세요: 브랜드 마크, 주제, 소재, 분위기, 레이아웃 또는 장면입니다.

<div style={{ display: 'grid', gridTemplateColumns: 'repeat(auto-fit, minmax(250px, 1fr))', gap: '1rem', margin: '1rem 0 2rem' }}>
  <div style={{ gridColumn: '1 / -1', border: '1px solid rgba(46, 41, 41, 0.1)', borderRadius: '12px', overflow: 'hidden', background: '#fffdf9' }}>
    <div style={{ padding: '1.1rem' }}>
      <div style={{ fontSize: '0.78rem', textTransform: 'uppercase', letterSpacing: '0.08em', color: '#df7657', fontWeight: 750 }}>Multi-reference</div>
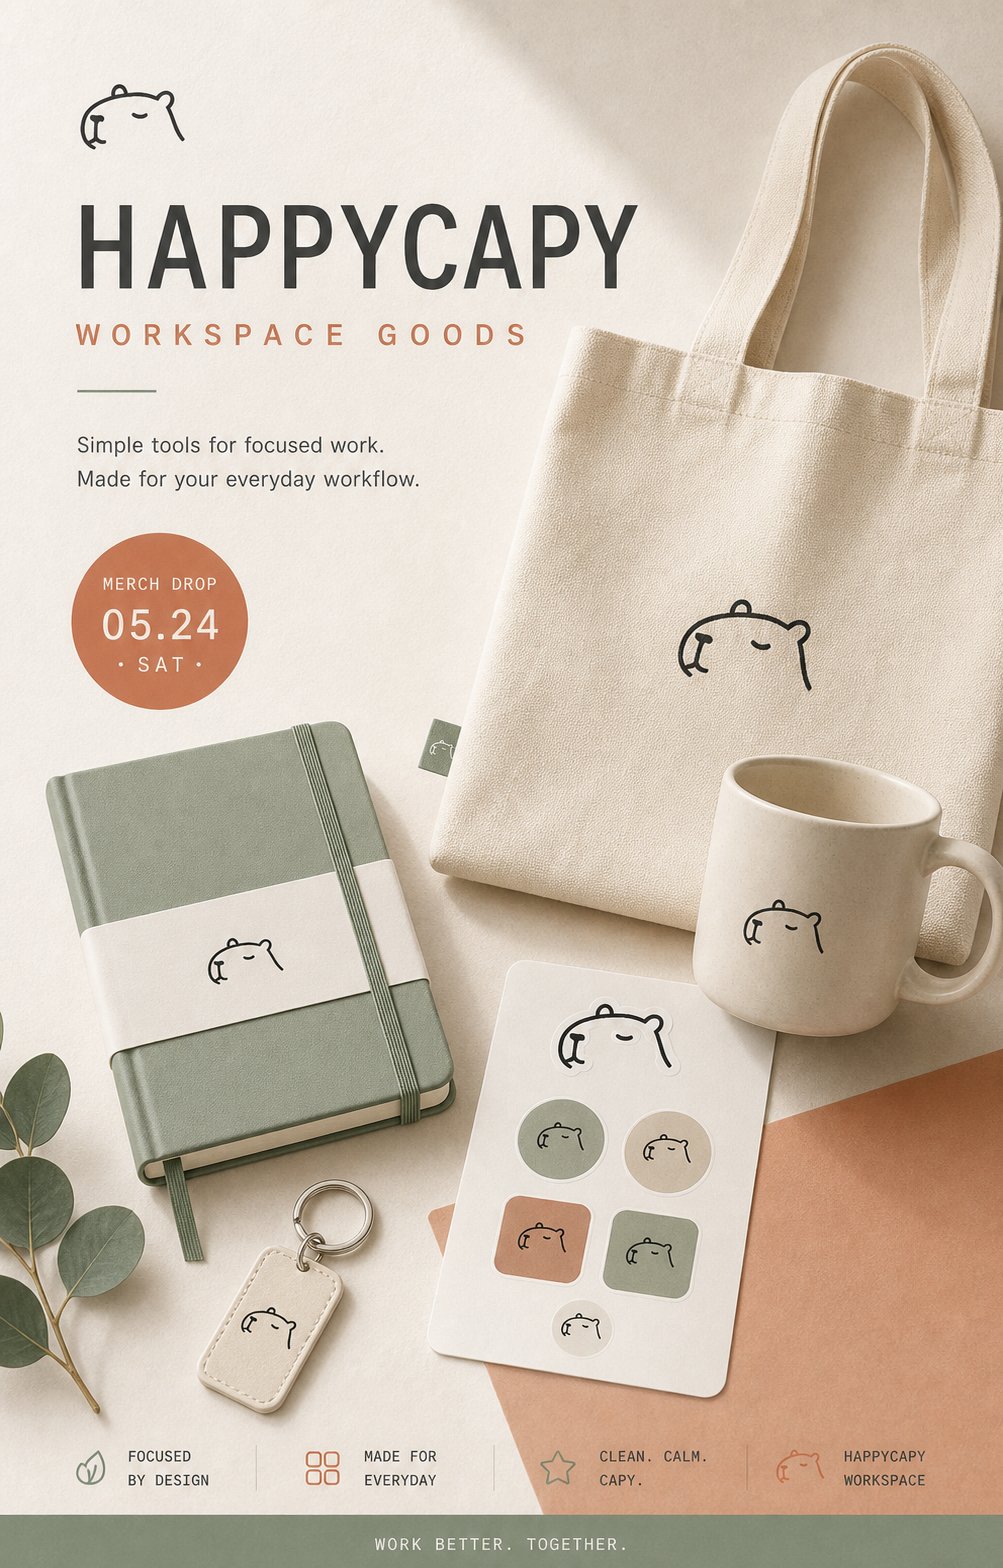
      <h3 style={{ margin: '0.35rem 0 0.55rem', fontSize: '1.3rem' }}>세 가지 참고 이미지로 굿즈 캠페인 만들기</h3>
      <p style={{ margin: '0 0 1rem', color: '#6e6861', fontSize: '0.95rem', lineHeight: 1.55 }}>하나는 브랜드 마크를, 하나는 굿즈 오브젝트를, 하나는 캠페인 분위기를 제어합니다. 각 참고 이미지의 역할을 명확히 말하세요.</p>

      <div style={{ display: 'grid', gridTemplateColumns: 'repeat(auto-fit, minmax(260px, 1fr))', gap: '1.25rem', alignItems: 'start' }}>
        <div style={{ display: 'grid', gap: '0.75rem' }}>
          <div style={{ display: 'grid', gridTemplateColumns: '84px minmax(0, 1fr)', gap: '0.75rem', alignItems: 'center', padding: '0.7rem', borderRadius: '10px', background: '#f8f6f2' }}>
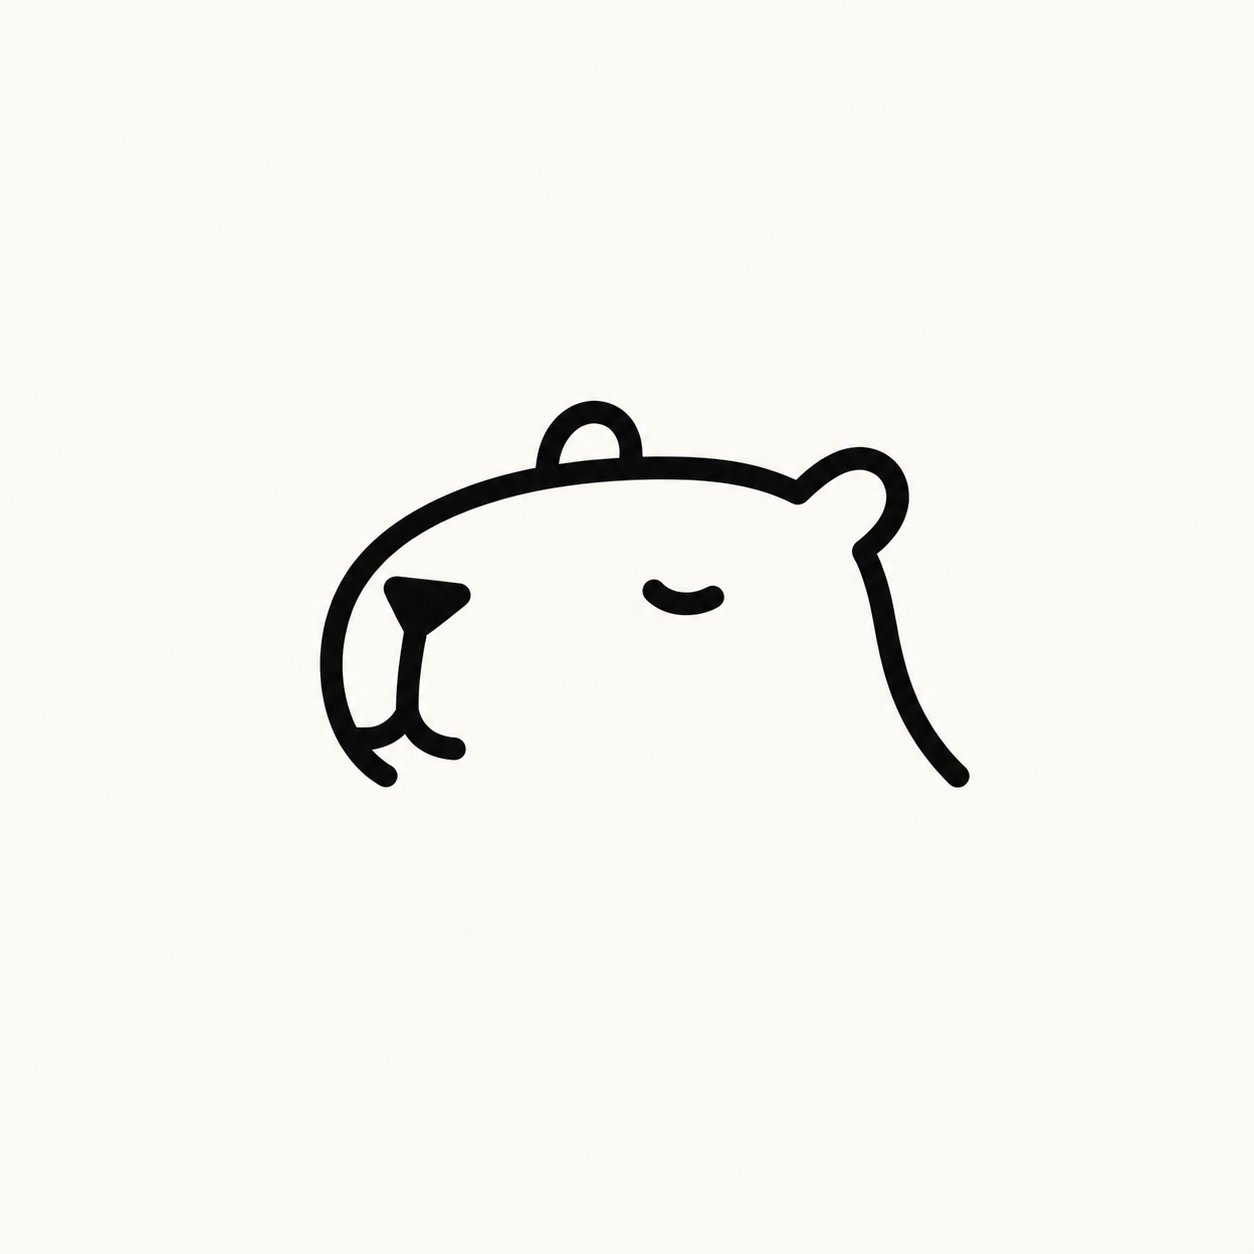
            <img src="https://mintcdn.com/happycapy/h9_vLtvDfrXu5HTP/images/features/image-ref-happycapy-logo.png?fit=max&auto=format&n=h9_vLtvDfrXu5HTP&q=85&s=ff2087580b0aecea61c9d618db21db41" alt="Happycapy 로고 참고 이미지" style={{ display: 'block', width: '84px', height: '84px', objectFit: 'cover', borderRadius: '8px', border: '1px solid rgba(46, 41, 41, 0.1)' }} width="1254" height="1254" data-path="images/features/image-ref-happycapy-logo.png" />

            <div>
              <div style={{ color: '#df7657', fontSize: '0.78rem', fontWeight: 750, textTransform: 'uppercase', letterSpacing: '0.08em' }}>Image 1</div>
              <p style={{ margin: '0.2rem 0 0', color: '#4d4640', fontSize: '0.88rem', lineHeight: 1.45 }}>Happycapy 브랜드 마크와 라인 아이콘 정체성을 제어합니다.</p>
            </div>
          </div>

          <div style={{ display: 'grid', gridTemplateColumns: '84px minmax(0, 1fr)', gap: '0.75rem', alignItems: 'center', padding: '0.7rem', borderRadius: '10px', background: '#f8f6f2' }}>
            <img src="https://mintcdn.com/happycapy/h9_vLtvDfrXu5HTP/images/features/image-ref-merch-objects.png?fit=max&auto=format&n=h9_vLtvDfrXu5HTP&q=85&s=ade0a16c4a6c926d10e030ac59f88dd5" alt="빈 굿즈 오브젝트 참고 이미지" style={{ display: 'block', width: '84px', height: '84px', objectFit: 'cover', borderRadius: '8px', border: '1px solid rgba(46, 41, 41, 0.1)' }} width="1254" height="1254" data-path="images/features/image-ref-merch-objects.png" />

            <div>
              <div style={{ color: '#df7657', fontSize: '0.78rem', fontWeight: 750, textTransform: 'uppercase', letterSpacing: '0.08em' }}>Image 2</div>
              <p style={{ margin: '0.2rem 0 0', color: '#4d4640', fontSize: '0.88rem', lineHeight: 1.45 }}>굿즈 오브젝트, 소재, 제품 시점을 제어합니다.</p>
            </div>
          </div>

          <div style={{ display: 'grid', gridTemplateColumns: '84px minmax(0, 1fr)', gap: '0.75rem', alignItems: 'center', padding: '0.7rem', borderRadius: '10px', background: '#f8f6f2' }}>
            <img src="https://mintcdn.com/happycapy/h9_vLtvDfrXu5HTP/images/features/image-ref-campaign-layout.png?fit=max&auto=format&n=h9_vLtvDfrXu5HTP&q=85&s=c50a41ca0494509b045195a9b4caa4fd" alt="캠페인 레이아웃과 분위기 참고 이미지" style={{ display: 'block', width: '84px', height: '84px', objectFit: 'cover', borderRadius: '8px', border: '1px solid rgba(46, 41, 41, 0.1)' }} width="1254" height="1254" data-path="images/features/image-ref-campaign-layout.png" />

            <div>
              <div style={{ color: '#df7657', fontSize: '0.78rem', fontWeight: 750, textTransform: 'uppercase', letterSpacing: '0.08em' }}>Image 3</div>
              <p style={{ margin: '0.2rem 0 0', color: '#4d4640', fontSize: '0.88rem', lineHeight: 1.45 }}>포스터 분위기, 색상 팔레트, 조명, 레이아웃을 제어합니다.</p>
            </div>
          </div>
        </div>

        <div style={{ justifySelf: 'center', width: 'min(100%, 360px)' }}>
          <img src="https://mintcdn.com/happycapy/h9_vLtvDfrXu5HTP/images/features/image-output-happycapy-merch-poster.png?fit=max&auto=format&n=h9_vLtvDfrXu5HTP&q=85&s=ba7da75274a135ea40693b614999f892" alt="생성된 Happycapy 굿즈 캠페인 포스터" style={{ display: 'block', width: '100%', aspectRatio: '4 / 5', objectFit: 'cover', objectPosition: 'center top', borderRadius: '12px', border: '1px solid rgba(46, 41, 41, 0.1)', boxShadow: '0 18px 40px rgba(46, 41, 41, 0.08)' }} width="1003" height="1568" data-path="images/features/image-output-happycapy-merch-poster.png" />
        </div>
      </div>

      <div style={{ marginTop: '1rem', padding: '0.85rem', borderRadius: '9px', background: '#f8f6f2', color: '#4d4640', fontSize: '0.86rem', lineHeight: 1.55 }}>
        <p style={{ margin: '0 0 0.65rem', color: '#8a8178', fontWeight: 700 }}>Happycapy에게 요청하기</p>
        <code style={{ whiteSpace: 'pre-wrap' }}>Use image 1 as the Happycapy brand mark reference. Keep the simple capybara line icon recognizable, but use it as a tasteful logo on the products.{"\n\n"}Use image 2 to control the merch objects, materials, and product perspective. Use image 3 to control the campaign mood, color palette, lighting, and layout.{"\n\n"}Create one 4:5 editorial campaign poster for a fictional Happycapy merch drop. Show the logo applied to the merch objects in a clean, premium way. Save it as outputs/happycapy-merch-campaign.png.</code>
      </div>
    </div>
  </div>
</div>

## 관련 리소스

* [Files](/ko/features/files): Project 안에서 업로드한 참고 이미지, 생성 이미지, `outputs/` 파일을 관리합니다.
* [AI Image Generator](https://happycapy.ai/tools/ai-image-generator): 더 많은 이미지 프롬프트 아이디어를 보고 바로 이미지 생성을 시도할 수 있습니다.